CRAFTY CHICA: Glass Jar Craft Ideas

Friday, November 30, 2012
1. Tree in a jar. Earlier this month I had a whirlwind trip to Miami and spent an evening window shopping with my friend, Pearmama. We wandered into Anthropologie and I gasped when I saw these fun jar decorations. They're made from Mason jars, mini-jars and salt shakers. They're filled with faux snow and have a little object inside. No water, glycerin, etc. Pretty simple. Priced starting at $18, I knew I wanted to come home and make some.

2. Also spotted - these hanging glass dome ornaments! They look like little fish bowls turned upside down and glued to cardboard. I got all excited and realized...I've actually made and shared several jar crafts! Here are my versions and then I'll show you some others I found online and from my crafty amigas! I think we should all make jar crafts this season!

3. Bottle Picture Frame. This is a Starbucks Frapuccino jar. I removed the label and inserted a family photo with some other objects. I used rub-on letters and accents and then tied a little medal at the front.


4. Candle Jar Shrine. These little shrines, I assembled using glass candles holders (you can also use small juice glasses). I didn't only decorate the inside, but also on top too! Here are the project directions.


Photo by Cyndi Coon of Lovely Lula


5. Message in a Jar. Also this month, I helped organize the 3rd Annual Phoenix Craft Rave. My co-organizer, Cyndi Coon, hosted a DIY make-and-take project called "Message in a Jar." This was sooo cute, people loved it. This would be a great project for a girls night out craft or a wedding shower, etc. Here is a little video I recorded for you! (Pardon my shaky camera skills).


Photo by Jaimee  Rose

6. Bell jars! This is from another friend of mine, Jaimee Rose. She has a whole blog post all about bell jars! Very inspiring!
Photo by Jaimee Rose.
Her mom makes them every year and fills them with memory objects!

Photo by Taylor Swift.

7. Snowglobe in a Jar. Us crafties have been making these for years, but Taylor Swift gave them a new sense of popularity when she made these for her friends and posted it on her Facebook page last year. Need a tutorial? I have one!

Soooo...are you inspired to use jars n your crafting this season? What are you planning to make? Wouldn't it be fun to incorporate glass etching too? Which is your favorite jar craft? What else can you do with jars? Am I overloading you with questions?

xo!
Kathy :-)

Wool Felt Christmas Tree Wall Art, Christmas Mosaic Brick and more! Cool2Craft TV


Hello to all our Aleene's fans! Tiffany and Heidi here :)

We want to personally invite you to watch Monday's Cool2Craft TV with us! Cool2Craft TV December 3, 2012: Christmas Celebrations

The Cool2Craft girls are sharing Christmas inspired projects. Tiffany is creating Wool Felt Christmas Tree Wall Art with Aleene's Turbo Tacky Glue and EcoHeidi is crafting a Christmas Tree Mosaic Brick with Aleene's Tacky Glue. Plus we'll be sharing abelieve book, holiday cupcake toppers, a reversible gift bag and a mini felt tree ornament.

Learn new techniques, chat with us while watching the show and ask questions about all your favorite Aleene's products! Drop by our chat room during Monday's show and mention that you saw this post on the iLovetoCreate blog for your chance to win Aleene's Tacky Glue!

Airing Monday December 3, 2012 9am Pacific/11 am Central/Noon Eastern. Go to Cool2Craft.com and you'll see the link to the Livestream player and chat box where you can join right in. See you Monday!

Visit us on Facebook! Get creative! Get inspired! Be cool!


Yarn Wrapped Cupcake Ornament How-To

Thursday, November 29, 2012

Christmas time is here! Finally I can start decorating the house and making crafty Christmas ornaments. Ok, the decorations have been up for a few weeks - but now I can openly talk about it. Today for I Love to Create I want to share a fun ornament I whipped up in about 5 minutes.

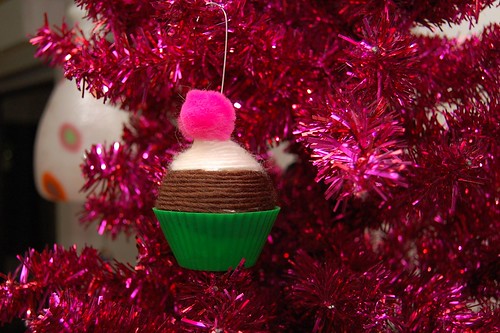
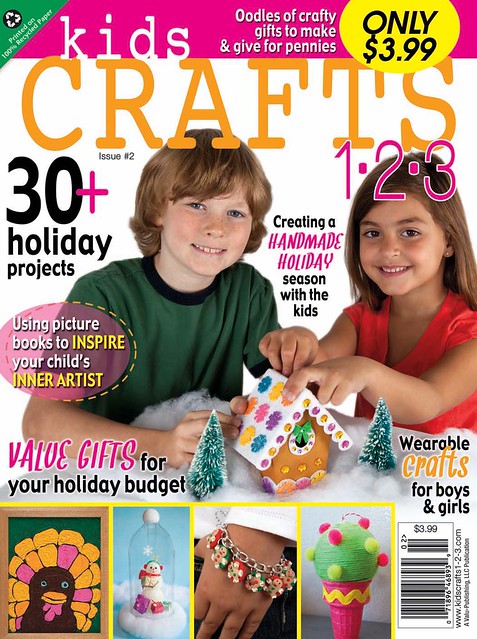
By now you have hopefully been to Walmart and gotten your hot little hands on a copy of Kids Crafts 1-2-3 the new magazine I am the editor for. I also happen to do a few of the crafts from time to time. You can see my handiwork on the cover with an ice cream cone Christmas ornament. The ornament is a yarn wrapped version of an ice cream cone ornament I did last year. I decided to roll with the sweet theme and go for a cupcake version!

SUPPLIES

Aleene's Tacky Glue

ornaments

Silicone cupcake liner

Scissors

Yarn

pom pom

The first thing you want to do is find ornaments that fit in your cupcake liners. Once you do that wrap your ornament in yarn. I went for a chocolate cupcake with vanilla icing look.

When your ornament is completely wrapped in yarn glue into your silicone cupcake liner. Feel free to add gem stone sprinkles or a pom pom cherry on top.

All that is left to do is hang from the tree. Now I need to figure out how to make a doughnut version of this ornament.

Charity Wings "Hope" Canvas - In the Spotlight with Tiffany Windsor

I am so delighted to have been selected as one of the featured artists to participate in the Charity Wings fundraising for Hurricane Sandy Victims. I am one of eleven artists creating this 9×12 canvas. Throughout November and December, this canvas will make its way across the country as each artist adds to it. I added my embossed hearts to the canvas today using my Aleene's Tacky Glue! Check out this great fundraising idea and find out how you can purchase a print to help raise funds for Hurricane Sandy Victims - click here!


How to Make Paper Snowflakes Embellished Gift Bags

Wednesday, November 28, 2012

How to Make Paper Snowflake Embellished Gift Bags

(I'm stepping in for Avalon who is busy as a little bee with homework!)

Our favorite holiday movie here at Casa de Potter is Elf.  (We watch it all year round!)  In fact, we just watched it this past weekend.  One of my favorite scenes is when Buddy decorates the department store and makes a flurry of fabulous paper snowflakes.  It's been so long, I had to give myself a refresher course in how to make paper snowflakes.  Once I had it down, I decided to make some using upcycled magazine pages, we have a lot of magazines piling up around here and I hate to throw them away. 

Fair warning, this is very addictive.  Why stop at hanging them from the tree, when you can layer them on plain kraft paper gift bags and tags?  I am seriously smitten with these and plan to wrap all of our holiday gifts in snowflake embellished kraft paper wrappings this year.  

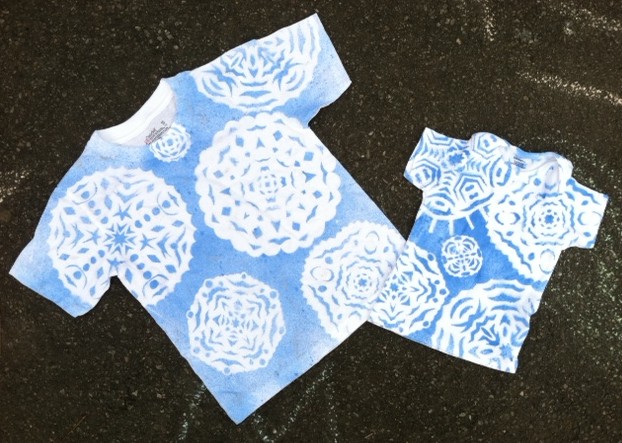
(I guess I'm not the only one with snowflakes on my mind, Megan Nicholay made some seriously cute snowflake stencil t-shirts yesterday!) 

Materials
Text printed magazine pages
Kraft gift bags
Kraft gift tags
Plastic rhinestones
White and Off White Buttons
Jute or hemp twine
Aleene’s Tacky Glue
Tulip Beads in a Bottle in clear with glitter
Tulip Fashion Glitter ultra fine crystal

Tools
Small paper friendly scissors
Hole punch
Paper plate


Cut standard size magazine pages into various sized snowflakes.  Paper can be full size sheet or halves or quarters. 


Fold paper in half.


Fold paper in half again, don’t score, just pinch edge to mark center point.


Fold right edge with bottom edge at center point on an angle that lines up with the top left corner.  


Fold left side overlapping center as before with folded edge flush to edge of first fold, as in photo.


Fold this in half one final time.  (The folds should be on the inside.)


Cut excess paper from above top of smaller interior fold.


Use a marker to trace a series of cuts or just roll freestyle, don’t cut too much off of folded edge, or your design may become too fragile.  Simple, bold cuts work best.  


Mark placement of snowflake on bag, cut off excess edge.  Depending on size of snowflake, you can use the excess edge to make a second or third snowflake on bag.  Cut them in different sizes for multiple snowflake bags!  


Use spray adhesive or gently dab thinned Tacky glue from a paper plate using a sponge pouncer across back of snowflake, make sure to get entire snowflake covered with a thin coat of glue.  Starting from the edge, press snowflake flush to bag using your fingers to remove any air bubbles.  Take your time to prevent tearing paper.  (You can also opt to use a brayer here.)


To embellish: Use Beads in a Bottle or a thin line of glue and loose glitter to add sparkling accents around the edges of all cut outs.  Glue rhinestones and buttons to snowflakes with Tacky Glue.  Allow bags to dry. 

To create matching tags: Repeat process but use a smaller starting size of paper. Punch a hole in the top edge of tag and tie to handles of bags with jute twine. 


Stenciled Snowflake T-shirts!

Tuesday, November 27, 2012

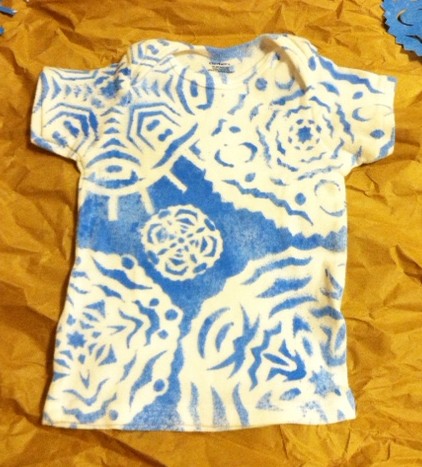
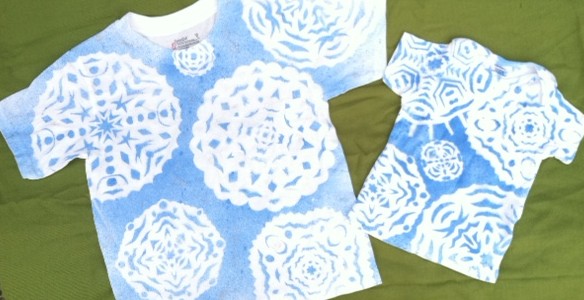
We had a wicked nor'easter blow through the East Coast last week, and though the snow pile-up lasted less than twenty-four hours, it sure put me in the mood for winter. So with the holidays upon us, I decided to make some wintery-themed T-shirts for the two young cousins (note: these tees can be made in adult sizes, too)--a little something to wear inside when it's too cold outside! And a nice alternative to the ubiquitous holiday sweater, don't you think?

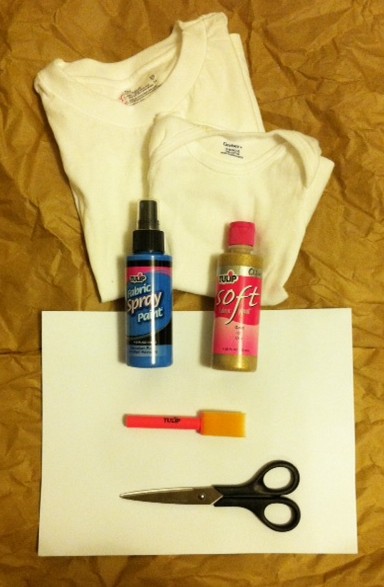
Materials:
-White T-shirt(s) in appropriate size(s)
-Tulip fabric spray paint (Light Blue)
-White printer paper
-Paper scissors
-Warm iron and press cloth
-Tulip Soft Fabric Paint (Gold Glitter, optional)
-Tulip Sponge Brush (optional)


Make it:
1. Fold one of the sheets of paper on a diagonal to "square" it. Use scissors to cut off the excess strip of paper.

2. Bring the lower left corner up to fold the triangle in half again.

3. And again!

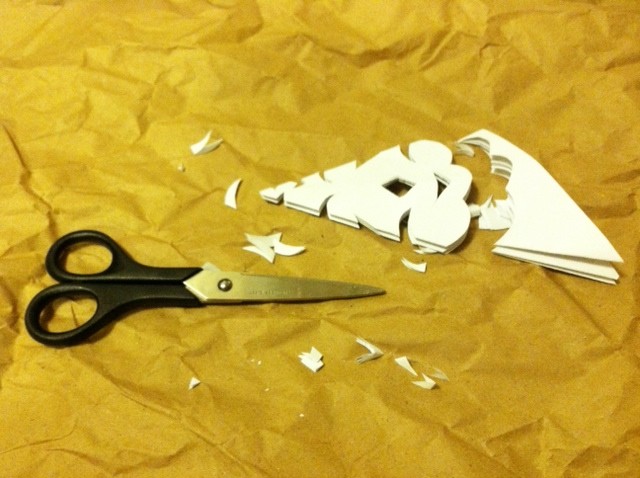
4. Use your scissors to start cutting notches along the folded edges: zigzags, circles, crescents, curls, diamonds, and so on! Don't forget to cut the open edges in an arc, so that the snowflake will be somewhat round in appearance when you unfold.

5. Unfold!

6. Repeat to make many snowflakes (no two will be alike)!


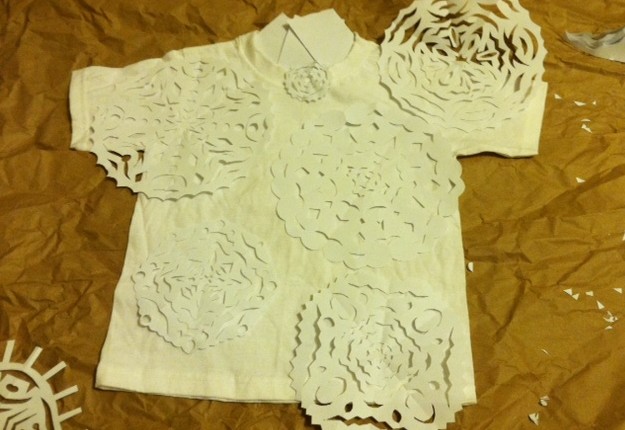
7. Lay the T-shirt flat on your work surface. Arrange the snowflakes onto the front, and press them with a warm iron to keep them relatively flat. (Note: The weight of the spray paint will actually help them stay flat, too.)

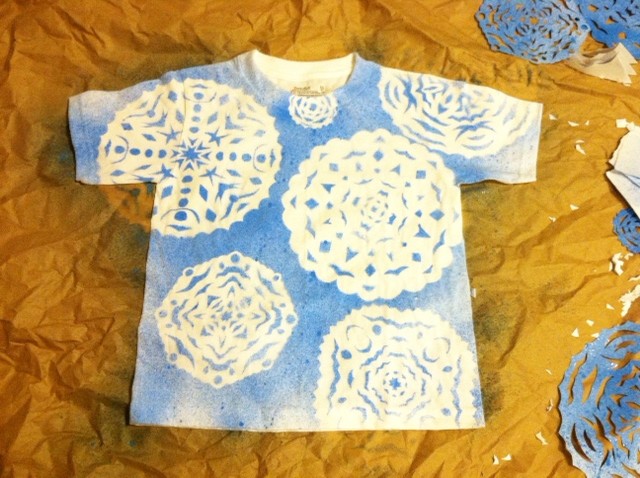
8. Lightly spray blue paint over the entire T-shirt (I masked the inside back neckband with paper scraps).


9. Carefully peel off the snowflakes and set them aside. Let the T-shirt dry.


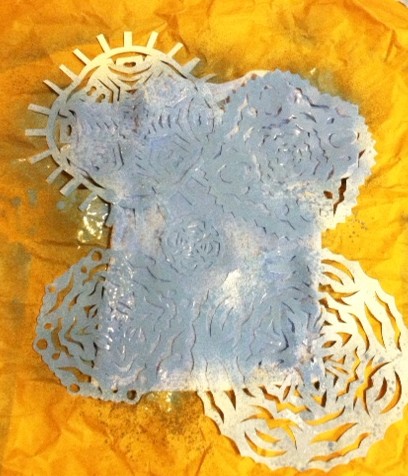
10. Reuse the snowflakes to make T-shirt number two!


Optional: Use the foam brush and glitter paint to add sparkly highlights to the snowflakes.

Let dry, then try on the shirt (or gift it to its recipient!), and curl up by the fire, knowing these snowflakes will never melt.