this great Tulip kit.
Tie Dye Tutorial - Shibori, Brushed, Scrunched
Saturday, May 28, 2011 at 11:30 AMthis great Tulip kit.
12 Cool Tie Dye Projects Roundup
Friday, May 27, 2011 at 11:33 AM
Are you looking for a fun summer or weekend tie dye project? Here at the iLoveToCreate blog, we've got ya covered! Here's an awesome serving of 12 really cool tie dye projects for you to try. From traditional tie dye techniques to dyeing yarn and revamping your existing clothes, here's some great tie dye projects that you can create in just a few hours!
Tie Dye Rosettes by Swelldesigner
Customizing Yarn with Vickie Howell
Tie Dye Bedsheets by Glitter, Glue, GLAM!
Wicked Cool Toddler Sweatshirt by Banana and Bug

Variety of Tie Dye Techniques from Frankly Speaking Too
Proenza Schouler Inspired Tie Dye Tank from Fabulous and Twenty
Ann Taylor DIY Tie Dye by Diapers Deadlines DIY.
Rainbow Embroidery Floss from i Sew Cute

Tie Dye Jeans by CutOut and Keep user Marrory
Tie Dye Shirt Revamp from Stylish in Suburbia
DIY Tie Dye Scrap Scarf by Cutout and Keep user Deeny!
Tie Dye Headband from T-shirt scraps by DMVS Got Style
Hope you are inspired by these projects! Now it's time to get outside and tie dye!!
Visit us on Facebook!
Craft on! Click here for today's daily giveaway!
Fabric Fusion at Maker Faire!
Thursday, May 26, 2011 at 12:45 PMLINK
She worked in a huge tent filled with piles of donated clothing, that crafty types sorted through, snipped and formed new articles of clothing.
Her responsibility was to show the art of making pretty fabric flowers. Yes, there were sewing machines, but many people opted for the non-stitch method - that's where Aleene's® Fabric Fusion® Permanent Dry Cleanable Fabric Adhesive came to the rescue!
And for those of you who did not make it to Maker Faire, she has a video tutorial for you!
LINK
From Angela:
I had the BEST time at Maker Faire this weekend and all the Fabric Fusion you sent was a big hit AND helped my project go so quickly.
Visit us on Facebook!
Craft on! Click here for today's daily giveaway!
Glittered Fruit
at 12:15 PM
Nothing makes your kitchen look bright and perky like a bowl of fresh fruit. Once you eat the fruit, or your bananas start to turn brown and barfy the fruit looses it's charm quickly. What if your fruit was bright, chipper & shimmery 365 days a year? Sound too good to be true? Grab your glitter for today's edition of I Love to Create and I'll show you how it's done.
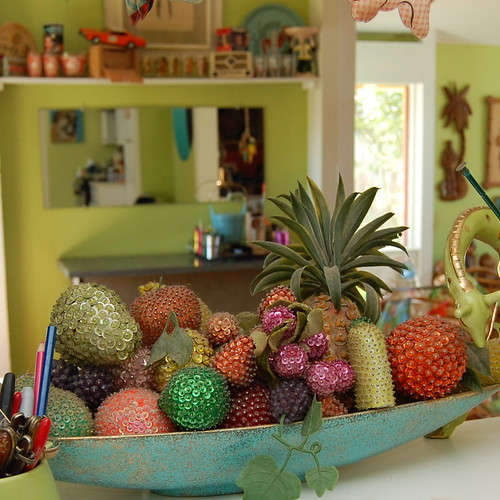
One of my 700 million collections is vintage beaded fruit. Apparently back in the day you could roll up to your local craft store and score some styrofoam shaped like fruit. From there you added sequins and beads using tiny little pins. I can feel the pain in my fingers just thinking about it, so I needed a much quicker and less painful option. Then I had a glitter epiphany.
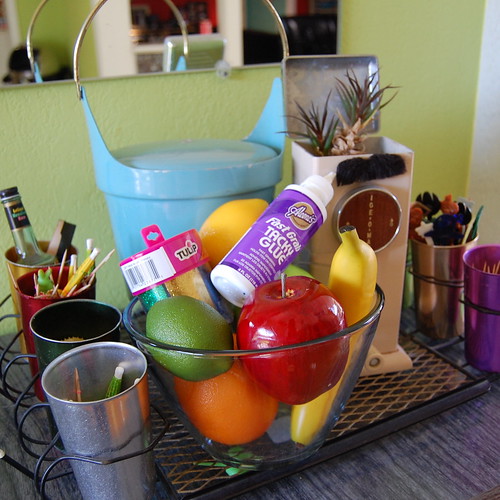
SUPPLIES
Paint Brush
Tulip Fashion Glitter
Bowl
Aleene's Fast Grab Tacky Glue
Faux Fruit
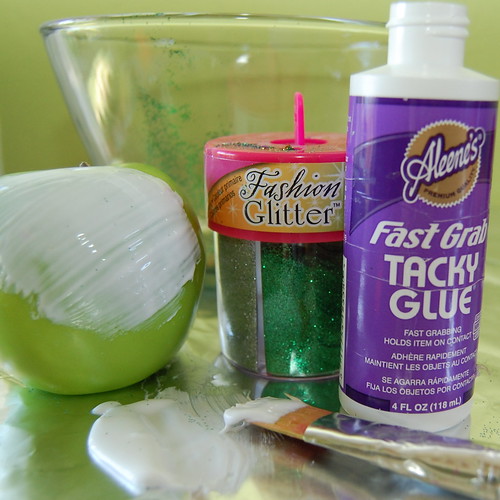
After prepping my work station a bit I was ready. This project is pretty dang easy: paint, shake & wait. First, I painted the glue on each piece of fruit.
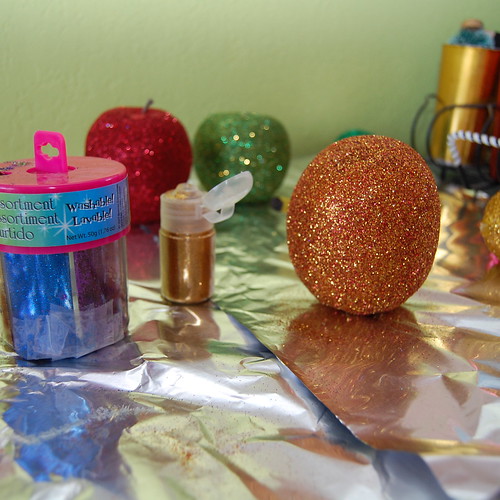
While the glue was still wet I sprinkled a thick coating of glitter on the fruit. Shake off the excess glitter and set aside to dry.

Sure glitter comes in orange and lime green, I just didn't happen to have any on hand and was too lazy to drive to the craft store to buy any. Just like you can mix paint to get any color you want, you can do the same with glitter. I glittered the red apple and shook off the excess glitter into a bowl. I then glittered the banana and the lemon and shook of the excess gold glitter into the same bowl. With a few tosses I had orange-ish glitter. I mixed gold and green to get the Granny Smith apple green.
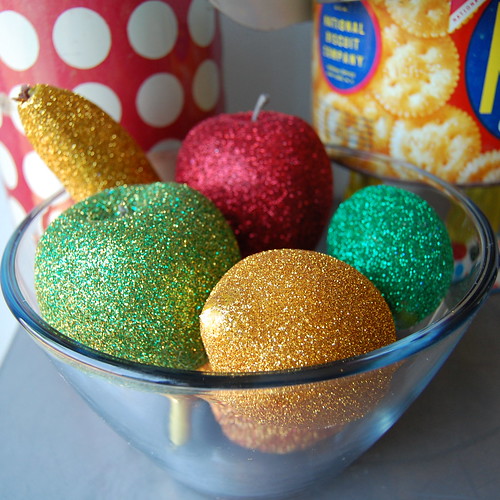
I j'dore the way the glittered fruit came out. Same kitsch and perk as the beaded fruit, but with a lot less work.

I might even let my new glitter fruit co-mingle in the bowl with my beaded fruit.

Visit us on Facebook!
Craft on! Click here for today's daily giveaway!
ILovetoCreate Teen Crafts: Beads and Flowers Tye Dye Headband
Wednesday, May 25, 2011 at 3:35 PMCraft on!Click here for today's daily giveaway!

Avalon Potter for ILovetoCreate Teen Crafts
Beads and Flowers Tye Dye Headband
"Teen crafted, Mom approved."
When I attended the CHA convention in Los Angeles for ILoveToCreate I got to use a great new product; Beads in a Bottle. Beads in a Bottle comes out in dabs of paint but dries like perfectly rounded beads. Everyone that saw this product just fell in love with it. Beads in a Bottle was so fun to use and so simple, I knew there had to be more I could with it than just make beads. This week I was planning to do a tie dye project with a headband. I could not find my tie dye kit, so instead I grabbed my Beads in a Bottle. While I was making the beads, I was rushing through and they were not turning out right. Finally I just chose to wipe the whole thing off. After I tried to wipe the paint off, I noticed how it looked like tie dye. I was so pleased with the effect, I decided to use it for my project this week. My mom calls this a craftastrophe turned into a crafty success!
Materials
Tulip Beads in a Bottle semi precious colors
2" thick white fabric covered head band
Paper towels
Aleene's Liquid Fusion glue
Large and small felt flowers with rhinestone accents in green, pink, and purple (wide enough to fit head band)
Instructions
1. Take your first Beads in a Bottle color and apply a few medium sized dots anywhere on the headband. This will be the test to determine how long to leave the paint on it.
2. After a few minutes take a paper towel and wipe the dots off going in the same direction. If it turns grayish and wipes right off it needs a little more time to dry or if the bottom sticks it needs a little less time to dry. Once it spreads evenly without coming off or sticking too much, you can start making semi-circles with the paint dots, arching the dots and randomly adding dots to the surface.
3. Let all of the dots dry for the appropriate amount of time then wipe them across the head band in one fluid motion like the ones you practiced with.
4. In any empty spots, fill in with whatever color you like using the same technique as before.
7. Once you have finished with adding and wiping off the beads, the headband should have a tye dyed/camouflage appearance to it.
8. Attach flowers to center of headband, working from edge to edge, using smaller flowers on thinner segments of the band and larger in the center.
10. Let the liquid fusion dry before wearing.

Girls Night Out - JoAnn Fabric Store - Mt. Juliet, Tennessee
at 5:00 AM


Visit us on Facebook!
Craft on! Click here for today's daily giveaway!
DIY Necktie for Dad!
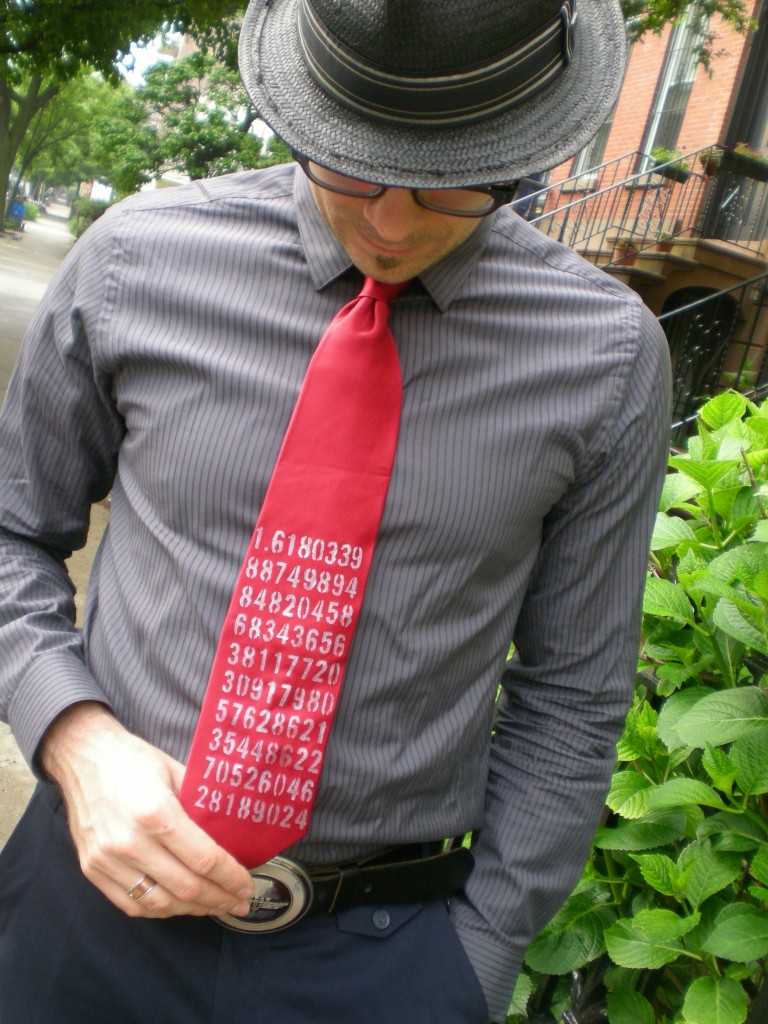
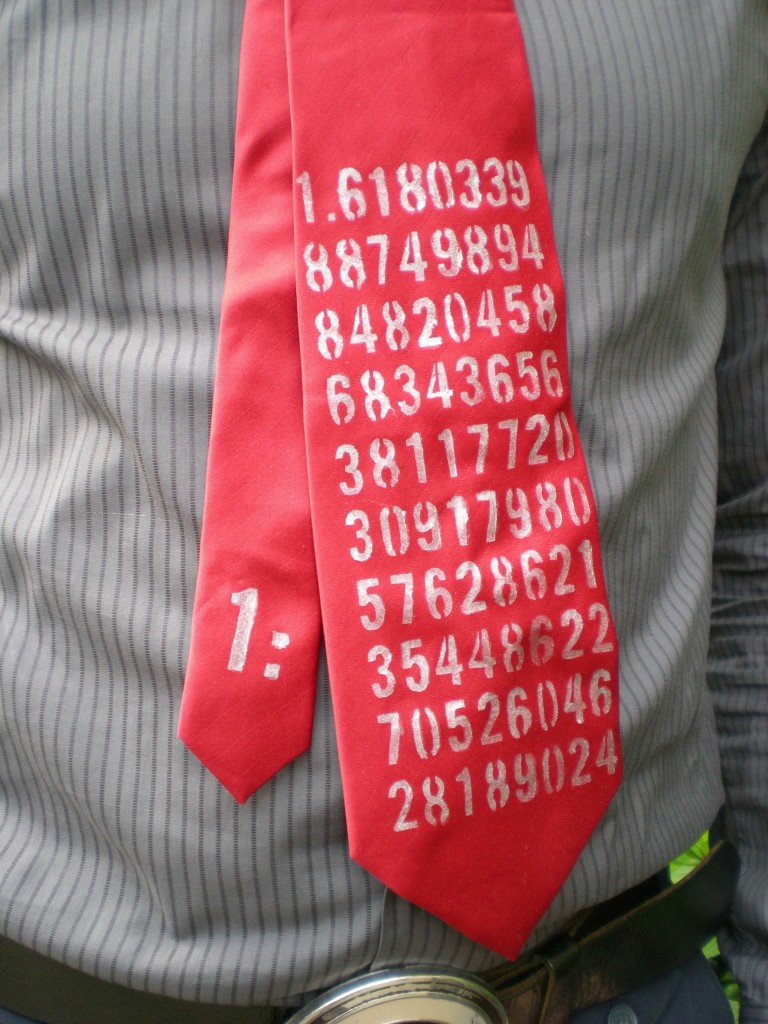
Tuesday, May 24, 2011 at 8:14 AMI know, I know -- a tie can be the ultimate in clichéd gifts for dad. But hear me out: The problem isn't with ties themselves, it's boring ties. Below is a technique for making a one-of-a-kind tie for that one-of-a-kind guy. Note: Lest there be any confusion, the photo below is not my dear ol' dad, but my charming husband, who's always a good sport when it comes to modeling my projects!
I have a history of making ties for my dad -- not because he's necessarily a tie-wearing kind of guy, but the school where he teaches has a dress code. And it states that all the guys have to wear a tie. It seems a little silly, given that he's an art teacher and a tie dangling in a tray of photo developer or getting splattered with clay in the ceramics room is far from ideal, but he's always embraced the tie with a great bit of humor and creativity.
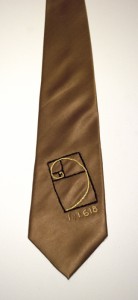
Though we couldn't dredge up the handmade tie I gifted him when I was 7 (suffice it to say, I must have cut out the tie myself, too, because it was about 6" wide and at least 6" too short), I decorated it with felt pieces arranged into the shape of a smiley face. In high school, I was obsessed with trips to the bead store, so I stitched some metal charms onto a black silk tie (above left). More recently, I embroidered the golden spiral inside a golden rectangle on the end of a tie (above right). But for my dad's next tie, I'm using fabric paint. Here's a project that a kid of any age can get into, and any dad will appreciate.
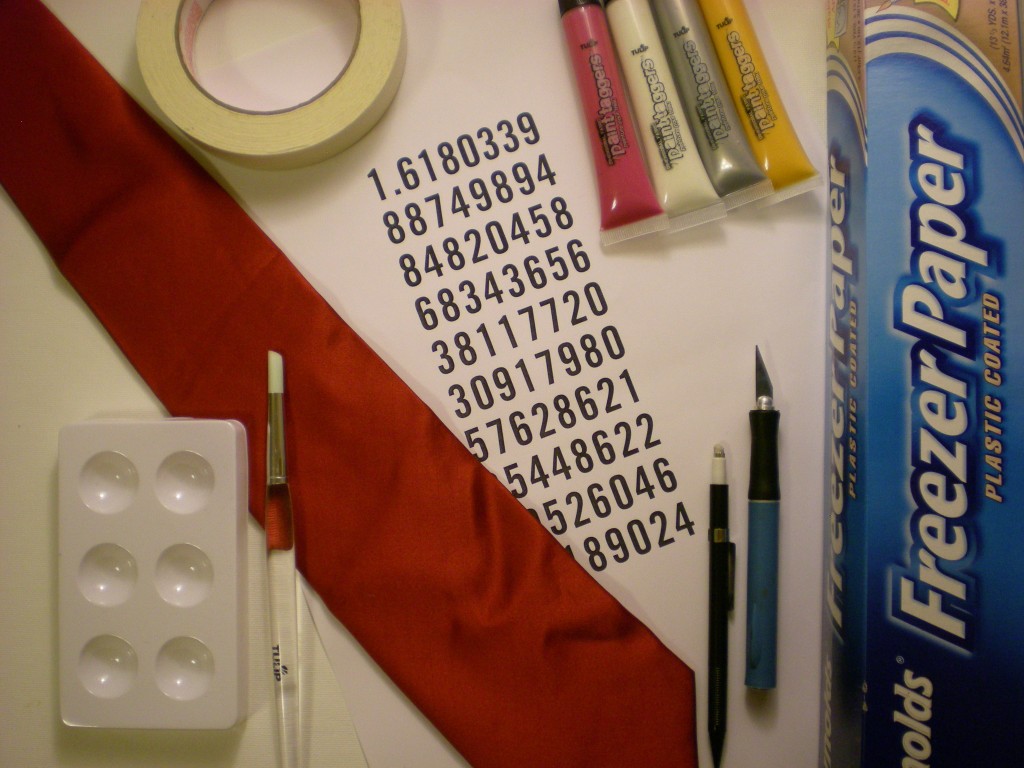
Materials:
-Plain necktie
-Image or pattern to turn into a stencil
-Freezer paper
-Pen or pencil
-Craft knife and cutting mat
-Artist's tape
-Tulip Fashion Graffiti Paint Taggers fabric paint
-Round paintbrush (for stenciling)
Make it:
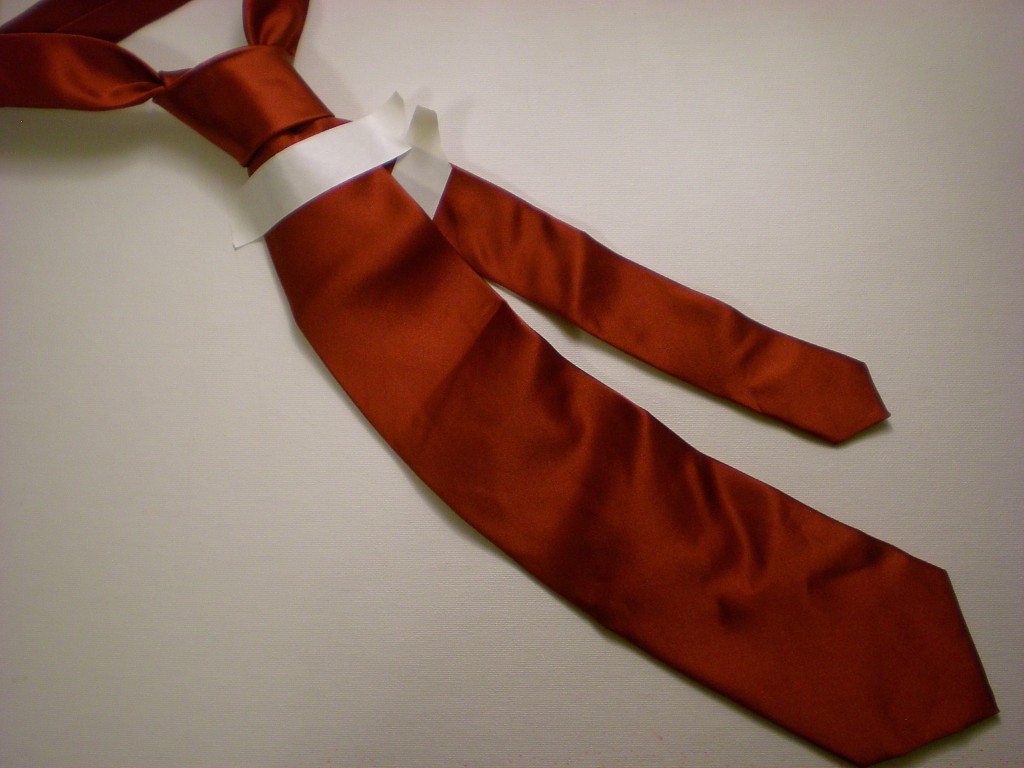
1. If you have the option, first tie the tie properly and mark the areas of fabric that will be most visible (it would be a shame to spend time on some delicate design only to have it hidden in the middle of the knot or under the collar). Otherwise, it's wise to keep the design down on the widest part of the tie. (I marked my tie, but then decided to keep the design near the ends.)
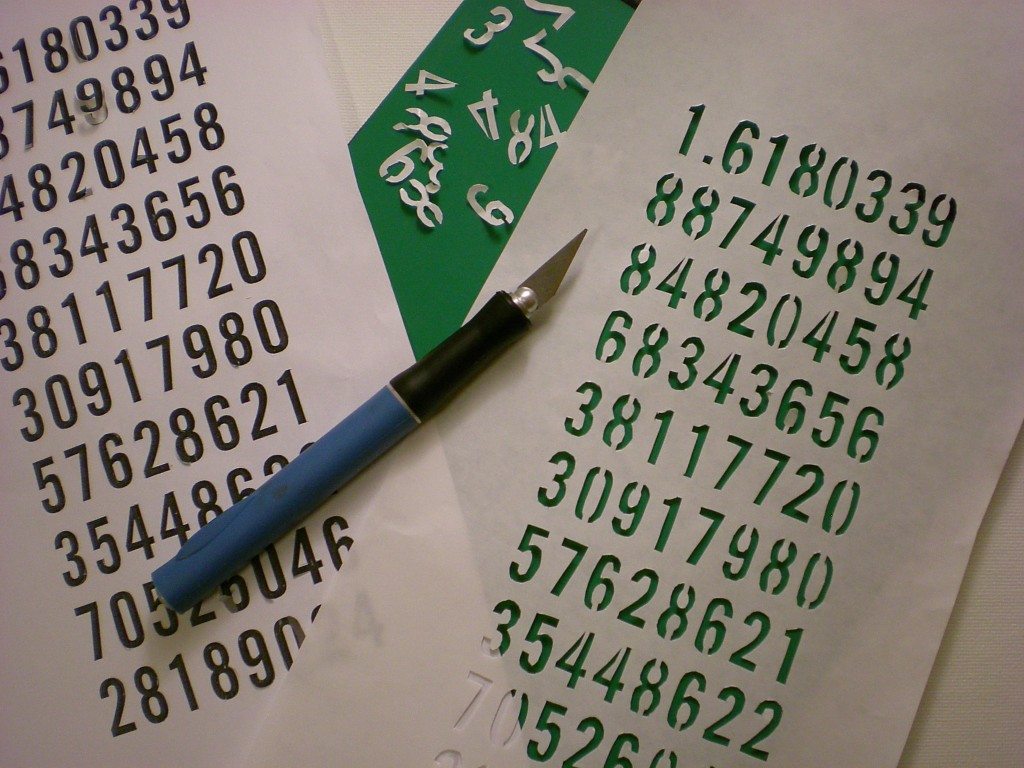
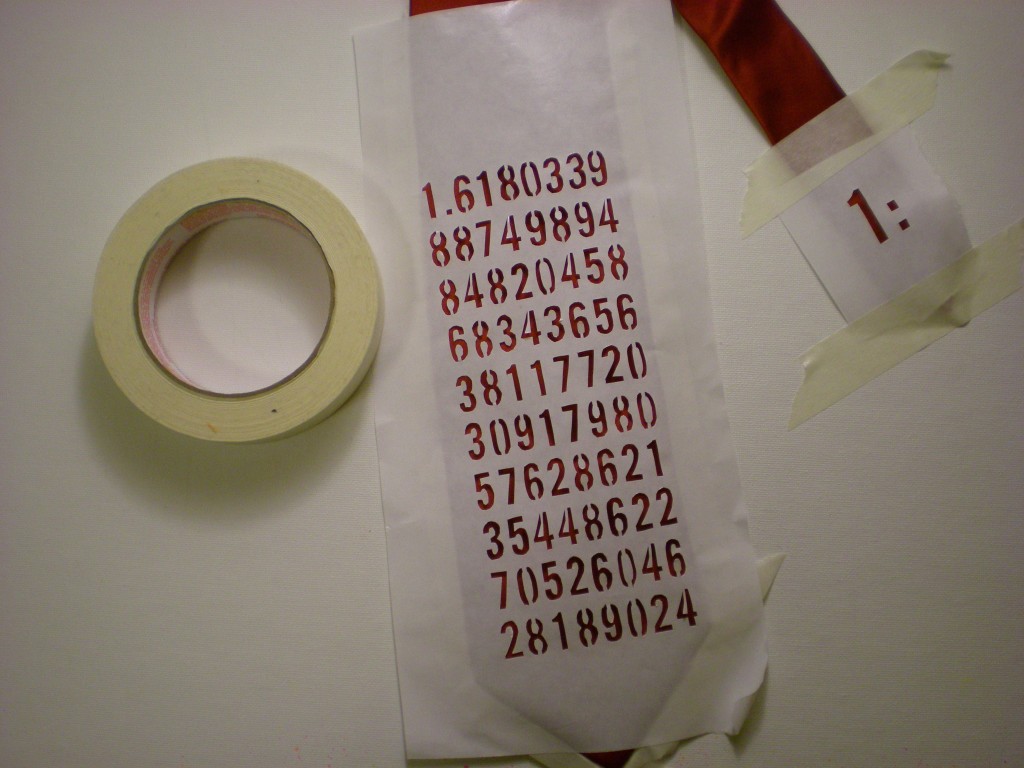
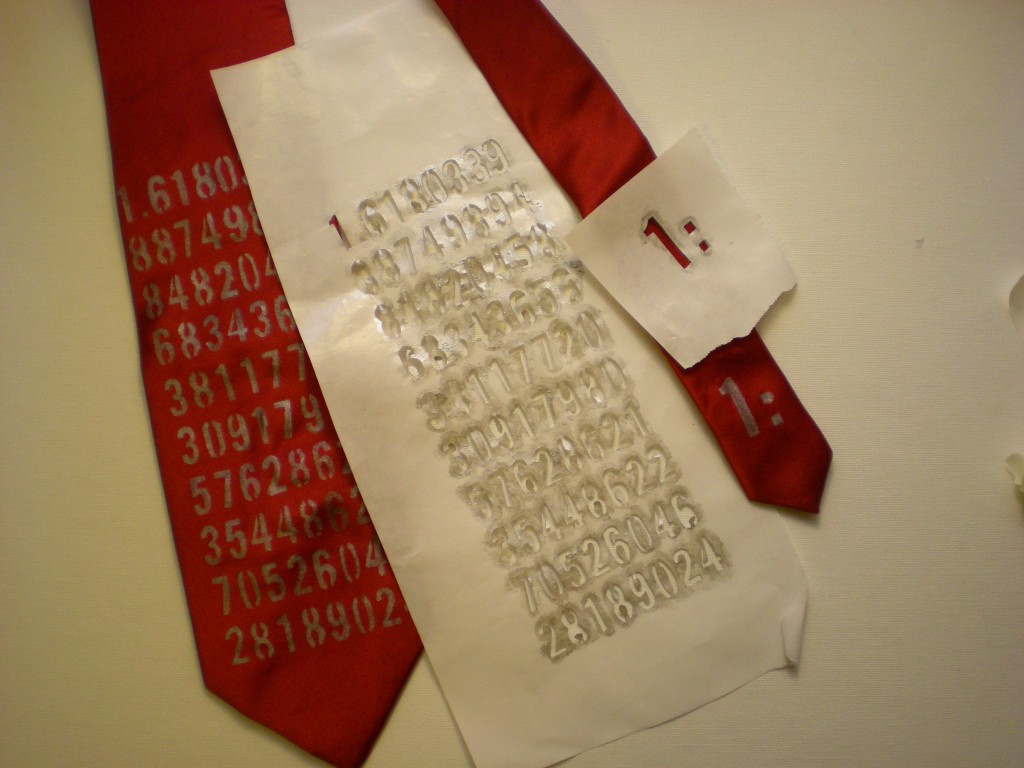
2. Choose your design and print it out. My dad has always been fascinated by the golden mean, a naturally existing ratio of approximately 1 to 1. 618 (see the embroidered tie above) that is used to describe the relationship of many living things found on earth (it's in the pattern of the seeds in a sunflower, the architecture of the spiral chambers in a shell, the growth of leaves on a plant stem, the ratio of hand to elbow and head to torso, and so on...). My dad even designed the house I grew up in using this ratio as the model. Then layer a piece of freezer paper over the printout and trace it. If you use letters or numbers (like I did), make sure you add the appropriate vertical lines to the type treatment so that when it comes to cutting and painting, you don't end up with an "O" or a zero that's missing its center. Use the craft knife to carefully cut out the stencil. Note: At this point, yes, I fully recognize that "#1 Dad" would have been far easier, but hey, it's all about personalization, and he happens to be my "#1 to 1.618033988749894848204586343656 Dad."
4. Arrange the stencil over the tie and tape it in place to prevent shifting. (I taped the front and back to make sure it was secure.) Note: Artist's tape should peel off well, but test a piece on the back of the tie to make sure it won't damage the fabric.
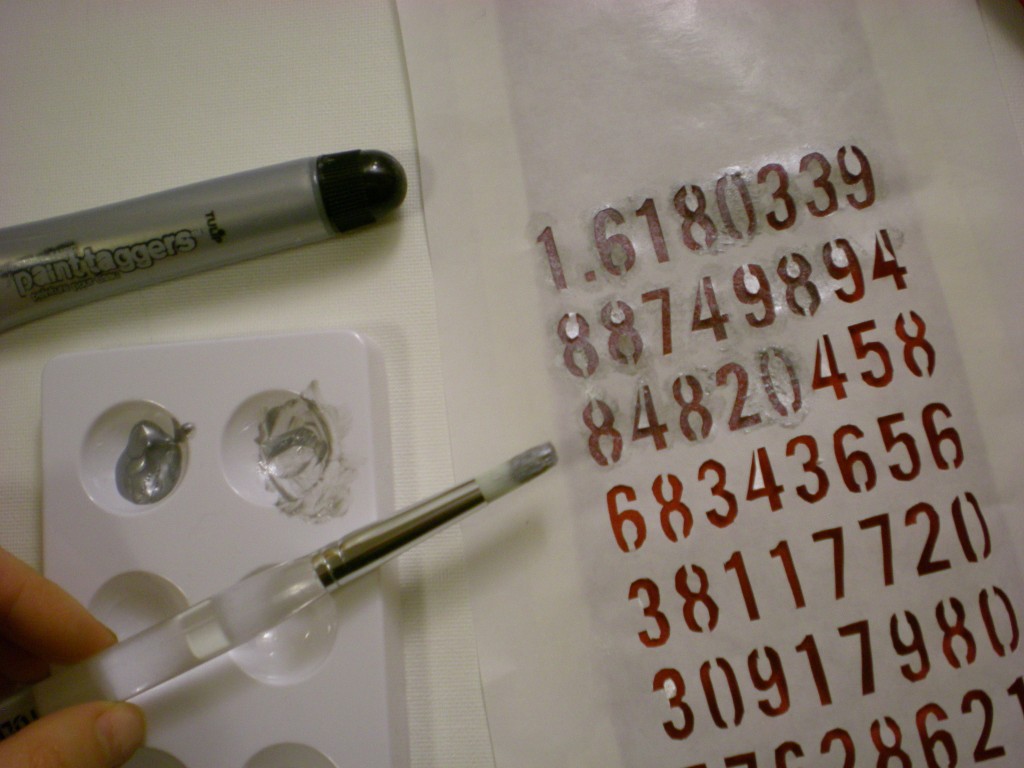
5. Adding very little paint at a time, dab the brush over the stencil. I picked a metallic silver paint, because I like the sheen and my dad can handle a little flair. To keep the paint from spreading underneath the edges of the stencil, hold the brush vertically so the bristles are perpendicular to the paint surface, and use a blotting motion.
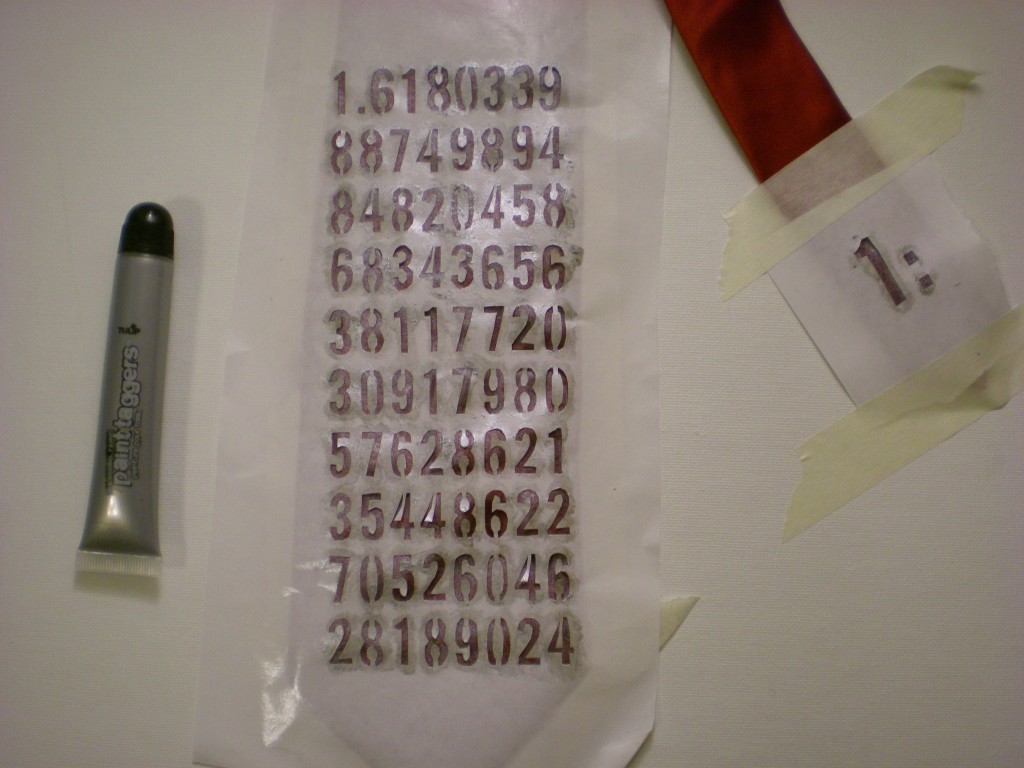
6. When you finish painting (don't forget the short end of the tie -- I decided to incorporate the first part of the golden ratio there, but you could also hide any semi-secret message there), let it dry.
7. When the paint has dried completely, carefully remove the tape and peel the stencil off the tie.
7. Now it's time to gift it. (Or convince your husband that he has to try it on this morning before he goes to work so you can photograph it before you pack it up and ship it off in time for Father's Day on June 19!)
Variations:
-For different pattern ideas, try any of the paint or sticker techniques in my 4 Ways to Spray post.
-Forget the stencils altogether and freehand a design with fabric paint.
-Forget the paints altogether and glue on felt appliqués!
-Bonus points if you make the tie out of T-shirts!

Visit us on Facebook!
Craft on!Click here for today's daily giveaway!


