Cool2Craft TV - Monday August 29, 2011
Friday, August 26, 2011 at 8:00 AMJoin host EcoHeidi Borchers for a new episode of EcoHeidi TV on the Cool2Craft TV Channel. This week's show theme is something from nothing. EcoHeidi crafts a necklace from water bottles, transforms bottle caps into a doll and shares the vintage Aleene's technique of Embossing with Glue featuring Aleene's Original Tacky Glue. Special guest Candace Jedrowicz creates a soda can lightcatcher. It's creatively cool!
It’s easy to watch the Cool2Craft TV Channel right from your computer. Airing Monday August 29, 2011 9am Pacific/10am Mountain/ 11 am Central/ Noon Eastern. Go to http://cool2craft.com and find the Livestream player and chat box. See you Monday!
Visit us on Facebook!
Craft on!Click here for today's daily giveaway!
Thrifting with a Crafty First Aid Kit
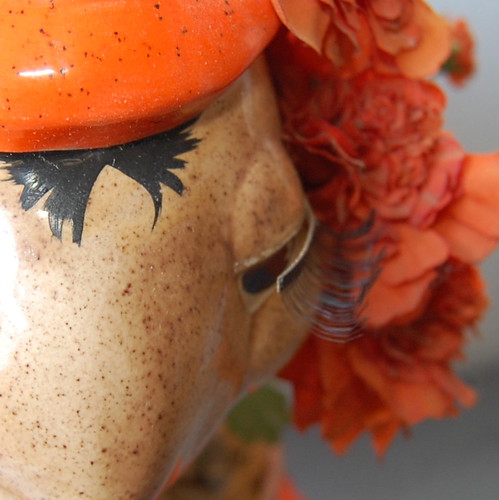
Thursday, August 25, 2011 at 1:32 PMI can't tell you how many times I have seen something at a thrift store or flea market, fell in love and then realized it was damaged. Stained clothing, chipped paint or in my case peeling eye lashes *insert sound of needle scratching off a record here* yup I said peeling eyelashes. A stash of handy craft supplies is all that stands between you and perfect thrift store scores. Today for I Love to Create, I'll give you a few of my recent examples.
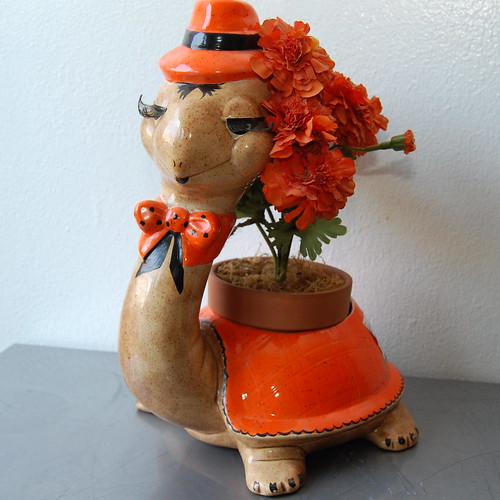
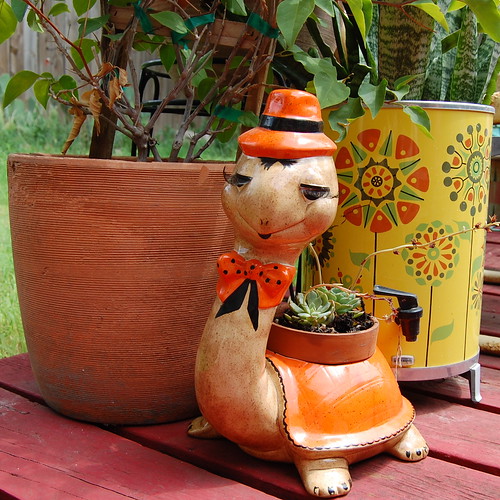
Hello Mr. Turtle Planter, when our eyes met it was kitsch love at first site. It was one of those moments where I could not grab him off the shelf quick enough for fear someone lurking nearby would swoop in and steal him from me. Needless to say there was no one around, but if there had been they would have surely wanted Terry I know it.
ANYWAY - Terry looks like he has had a bit of a rough night and is losing some of his eyelash glue. My first instinct was that he was damaged and I should not buy him since the lashes were one of the selling points (as if the bow time and hat were not enough). Then I thought to myself with a quick touch up using Tacky Glue Terry could be restored to his once glamourous self.
I recently started to notice that at the thrift store there is a distinct lack of clothing in 2T and 3T. Anyone who has a toddler knows why, clothing rarely makes it through toddler-hood unscathed. I can't tell you how many pieces of clothing Tallulah has ripped, stained and torn.
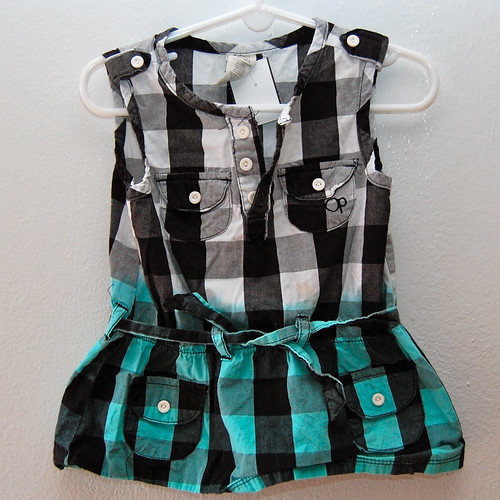
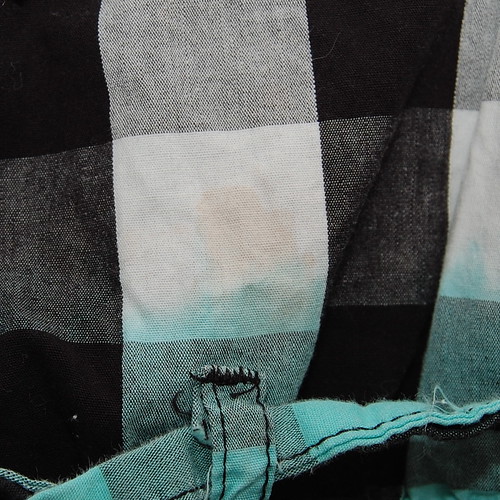
That being the case my theory is that there is hardly ever any toddler clothing worth donating to be much more than a rag. When I found this little black, white and teal top I was so excited at it's cuteness. I was not so excited about the small stains.
A few squirts of Tulip Spray Paint and I not only continued the ombre dye effect I also covered the stain and made the shirt even cuter. With Baxter venturing into the world of solid foods I expect I will be covering lot's of stained onesies with a quick dye job fix.
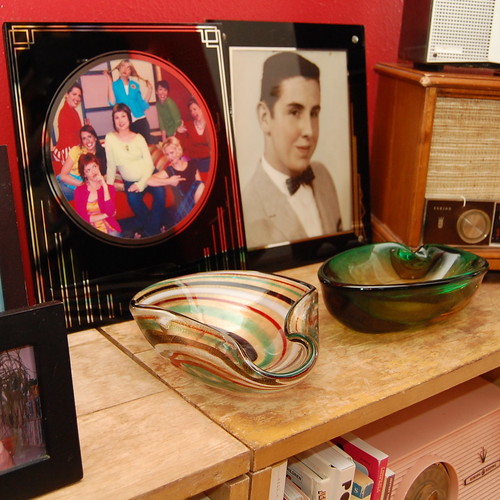
I love vintage glass art deco picture frames, the problem is finding them in pristine condition is not always an easy task. The frames often time are chipped and missing paint.
Never again should you snub a frame of any kind for a little chipped paint. All you need is a little Crafty Chica Paint and chips be gone.
Next time you find a second hand treasure that looks like it was loved a little too hard don't turn it away. Think of your crafty first aid kit and how you can easily make it new and improved!
Visit us on Facebook!
Craft on! Click here for today's daily giveaway!
Tiffany Windsor, iLoveToCreate® present Terrifically Tacky, Creatively Cool
Wednesday, August 24, 2011 at 10:38 AML to R: Heidi Borchers, Aleene Jackson, Tiffany Windsor. Visit the Aleene Jackson Craft Museum! |
Visit us on Facebook!
Craft on! Click here for today's daily giveaway!
Back To School Craft - Marker Monster!
at 8:37 AMVisit us on Facebook!
Craft on! Click here for today's daily giveaway!
ILovetoCreate Teen Crafts: Floral Stacked Bib Necklace
at 12:01 AMCraft on!Click here for today's daily giveaway!
ILovetoCreate Teen Crafts
Floral Stacked Big Necklace
Margot Potter for Avalon Potter
“Mom crafted, teen approved.”
Avalon had a mountain of school work this weekend, so I agreed to step in and make this project and let her focus on her school work. This was really easy and fun to execute and came together quickly using some fabulous new ILovetoCreate products mixed with Grungeboard from Tim Holtz. The fabric paints went on easily in two quick coats and the grey background softened the neon colors just enough. I LOVE the new Aleene’s Fabric Fusion Tape, no more waiting for glue to dry! I am impatient, have I mentioned that? Adding texture with the super easy to use Beads and a Bottle brought it all together perfectly. I think I’ll be borrowing this necklace myself in the near future. Just because it’s teen friendly doesn’t mean Mom can’t sport it too. Avalon squealed when she saw this, so I'm thinking...we have a winner here folks!
Materials
Scribbles brush on fabric paint in blue, green and pink neon
Tulip Beads in a Bottle Semiprecious in sparkly pink, turquoise and bright green
Aleene’s Fabric Fusion Peel and Stick craft tape
Plain Grungeboard basics sheets or other thick substrate
2 7” segments gun metal chain
Gun metal toggle clasp
Tools
Die cutting machine
Stacked flower dies
Scissors
Hole punch
2 pairs chain nose pliers
Scribbles paint brush
1. Use die cutting machine to cut flower shapes out of Grungeboard or other substrate (you could use canvas or denim here if you stiffen it with Aleene’s fabric stiffener spray to give it stability.)
2. Layer flowers in segments of three and then on top of one another to create a bib using Aleene’s Fabric Fusion tape to adhere the layers together.
3. Use Beads in a Bottle to add texture to flowers following shapes of petals. Start with the bottom layers and work up, taking care not to crush any of the beads as they are drying. If you have any mishaps, use paint brush to gently remove bead and add a new one.
4. Let beads dry overnight.
5. Create two u-shaped tabs to attach to top of bib segment on each side using glue tape. Use hole punch to create a hole in each tab for attaching chain.
6. Open and close chain links with chain nose pliers, sliding the bottom link on each chain into the holes on the tabs. Attach clasp to open ends of chain using pliers. Make sure chain links are fully secured.
Margot Potter For:
Flower Power Photo Frame
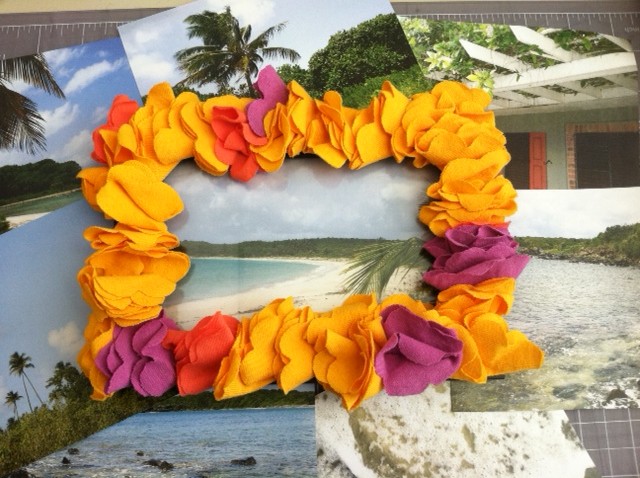
Tuesday, August 23, 2011 at 10:47 AMSo often these days a photo album is a mere online click, and a frame may simply be the outer edges of a smart phone as you flick through those saved photos. Having just returned from vacation, I was inspired to make something a little less fleeting to display my memories of beach, sand, and snorkeling. And what better material to use to celebrate summer vacation than scraps from that all-time summer favorite: the T-shirt.
Materials:
-T-shirt scraps (in various colors)
-Circular object (about 2.5" in diameter to use as a cutting template)
-Aleene's Fabric Fusion fabric glue
-Fabric scissors
-Blank picture frame
-Aleene's Tacky Line Runner (double-sided adhesive dispenser)
-Printed vacation photos to fit in the blank picture frame
1. Cut a series of circles from the T-shirt scraps. (I cut about 55 circles in order to cover a 4" x 6" frame.) Cut them all the same color or mix it up to add vibrant highlights to the frame -- I was inspired by the colors of the corals (yellow, salmon, and raspberry hued) that we snorkeled near in Vieques, Puerto Rico.
2. Select one circle, fold it in half, then fold it in half again. Cut a scalloped edge into the open (arced) edge so the piece of folded fabric becomes heart-shaped.
3. Unfold the piece of fabric (it should slightly resemble a four-leaf clover) and squeeze a small amount of fabric glue into the center. Fold it in half, with the edges slightly askew (so the petals don't line up exactly) and pinch.
4. Then apply a small dab of glue along the folded edge and fold it in half again to create a blossom.
5. Pinch the end and separate the petals and let dry. Repeat steps 2-4 for the remaining circles then set the blossoms aside.
6. Apply the double-stick adhesive liberally to the front of the frame. Be careful not to press your fingers into it since the oils will deplete the sticky qualities!
7. One by one, press the blossoms into the adhesive on the frame, angling and overlapping them to cover the frame and create a pleasing pattern.
8. Layer the flowers over the entire frame, and don't hesitate to cut more if you find gaps in the coverage.
9. Now for the hard part! Select a photo to place in the frame.
Variations:
-Use strips of T-shirt scraps to make into coils to decorate the frame.
-Simply cover the photo frame with T-shirt fabric and then embellish with a small cluster of blossoms.
-Use a cluster of these flower power blossoms to embellish a headband, hair tie, or brooch!
Visit us on Facebook!
Craft on!Click here for today's daily giveaway!
Puffy Paint to the Rescue!
Friday, August 19, 2011 at 11:28 AMVisit us on Facebook!
Craft on! Click here for today's daily giveaway!
Cool2Craft TV - Monday August 22, 2011
at 8:00 AMCool2Craft TV for August 22, 2011: Summer Picnic
Join host Tiffany Windsor for a new episode of Cool2Craft TV. This week's show theme is summer picnic. EcoHeidi Borchers sets the design theme for this picnic with a ladybug created from plastic spoons, forks and bottle caps using Aleene's Original Tacky Glue, Candace Jedrowicz wraps plastic utensils with beads and wire and Tiffany adds glitter to plastic drinking cups with the NEW Aleene's Tacky Double-Stick Sheets.
It’s easy to watch Cool2Craft TV right from your computer. Airing Monday August 22, 2011 9am Pacific/10am Mountain/ 11 am Central/ Noon Eastern. Go to http://cool2craft.com and find the Livestream player and chat box. See you Monday!
Visit us on Facebook!
Craft on!Click here for today's daily giveaway!
Big Game Hunting on a Thrift Store Safari
Thursday, August 18, 2011 at 2:48 PMEver wanted to go on a safari and hang your find proudly mounted on your wall? No, I don't mean the kind of safari where you wear khaki and shoot a poor animal in the Serengeti. I mean a thrift store safari. They have quite the selection of wild (stuffed) animals there. With a few crafty moves you could have a mounted head collection of your very own without harming a single hair on anyone's head.
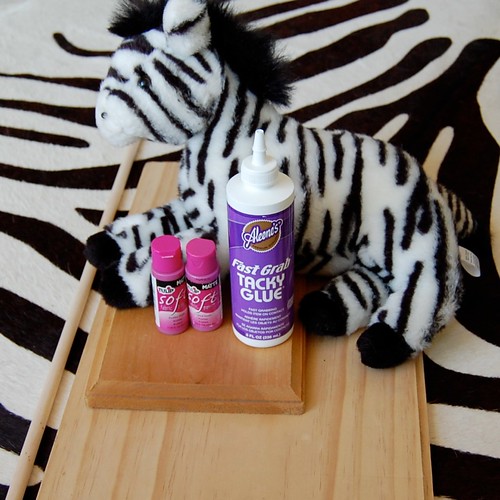
SUPPLIES
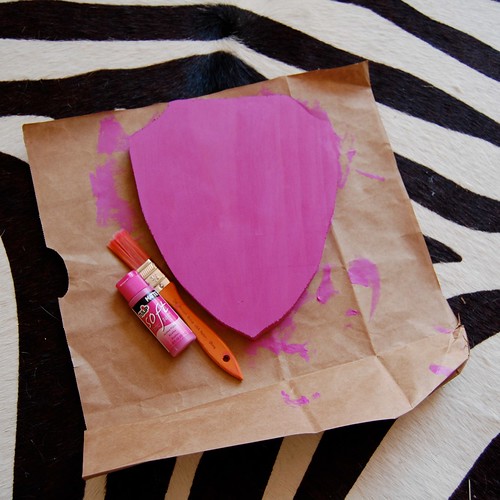
Tulip Fabric Paint in Azalea
Black Ribbon or Trim
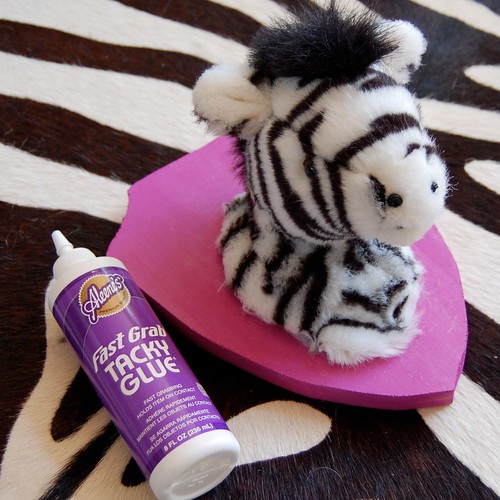
Aleene's Fast Grab Tacky Glue
Stuffed Animal
Wood Plaque
Jig Saw
Scissors
screws/nails
screwdriver/hammer
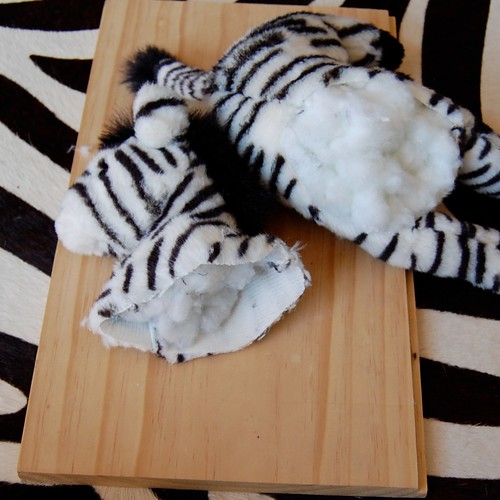
DECAPITATE
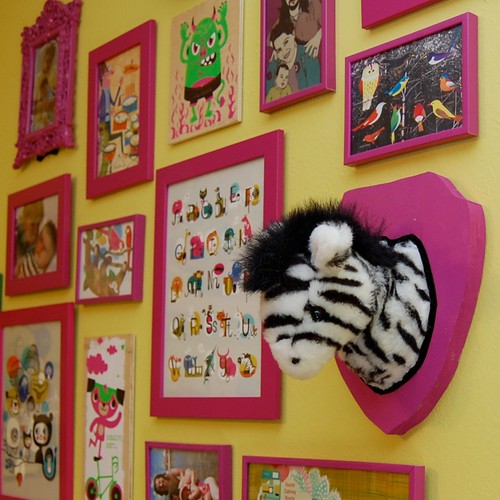
The first thing to do is decapitate your stuffed animal. It sounds morbid, but the end result is so cute you will feel better about the whole thing in a minute. I found my zebra at the thrift store, there is always a plethora of cast off creatures looking for a second chance at making someone happy.
PLAYING PLAQUES
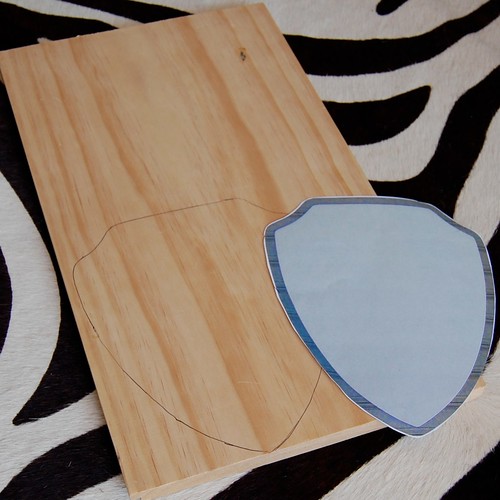
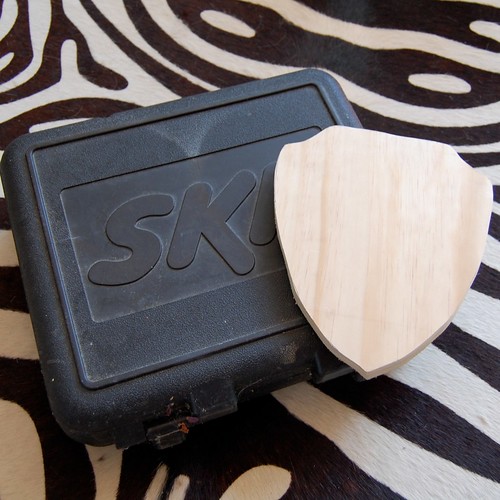
Once you have your head you will have a better idea about what size plaque you need. You can buy square or oval pieces of wood that work at most craft stores. I of course was determined to have the traditional shield shaped plaque to give my zebra a more majestic feel. Well as majestic as a mounted stuffed animal could be anyway.
I drew my design on the wood and using a saw I cut out the shape I needed. You may need to sand down any rough edges.
PRETTY IN PINK
Next up I used fabric paint on wood. Yup, I have done it before and know that it works. Interestingly I did it with a zebra themed craft project previously. This mounted zebra is going in the same nursery, so it only makes sense.
MOUNT UP
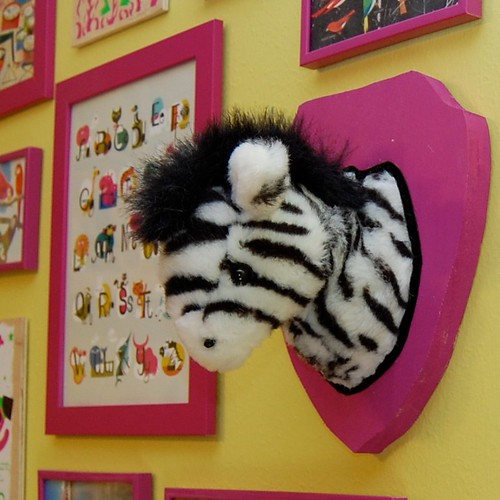
Once my paint dried completely it was time to mount Mr. Zebra. Using a combination of screws and Tacky Glue I attached the zebra to the plaque. You will just have to eyeball this part. You want to pull the fabric on the back of the zebra's neck taunt so that their head is up and not sticking straight out. It is best to nail or screw the fabric in place for this. Once your stuffed animal is positioned how you want them use Tacky Glue to attach all the stuffed animal edges to the wooden plaque.
TRIM IT
A little black trim was added around the rough edges to give the zebra a more finished look.
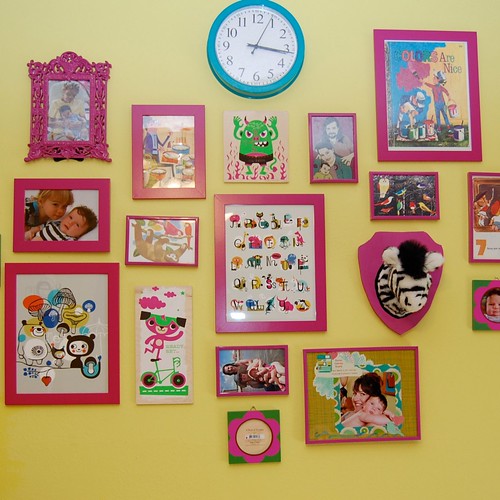
So go ahead do a little poaching. Thrift store poaching of course. There are plenty of lions, tigers and bears just waiting to grace your walls. This would also be an adorable way to display your child's favorite stuffed animals once they outgrow them. There is a Cabbage Patch Kid and a stuffed pink gorilla in my house who may soon have something in common with the Headless Horsemen.
P.S. Thanks Mom for all your help!!!
Visit us on Facebook!
Craft on! Click here for today's daily giveaway!
No-Sew Pasties
at 12:40 PMNo-Sew Pasties by Erica Davidson |
In the mood to make your own set? Click here: New-Sew Nipple Tassels Tutorial
Visit us on Facebook!
Craft on! Click here for today's daily giveaway!
MAYA IN THE MOMENT TEEN CRAFT: Ready For College Wall Clock!
Wednesday, August 17, 2011 at 1:44 PMThis is a clock that I decorated to symbolize that I may be a College student now, but I'll always be a kid at heart!
Supplies:
- Little Trinkets
- A metal clock
- Aleene's Jewelry&Metal Glue
- A child-like imagination
Glue on desired trinket where ever you please! It's good to choose smaller objects, to leave room for more! Once you start, it's difficult to stop!
I added Crafty Chica Mojito Papers, and Crafty Chica Loteria cards to act as the clock numbers!
I glued these on with Aleene's Tacky Glue, of course!
I LOVE how it turned out! Whenever I look at this clock I'll know to never lose sight of my inner-child!
Visit us on Facebook!
Craft on! Click here for today's daily giveaway!