Pretty Paper Flowers

Monday, October 31, 2011
I know it's Halloween, but once Halloween is over I start thinking about Christmas.  Today I'm sharing a few fun embellishments to make your presents look pretty.


They were fun and pretty easy to make.  I'll show you how I did all three.

The first one made by cutting out four wavy circles.  After cutting them I tried to curl the edges in a little and I used an ink pad to antique the edges of each layer.  I used Aleene's Tacky Dot singles to hold the layers together and to attach it to the present.  I love glue dots for paper crafting.  They are easy and clean.


I think it makes a really pretty gift topper.  I made some flowers like this to put on top of a jar when I made my neighbors honey butter last Christmas.


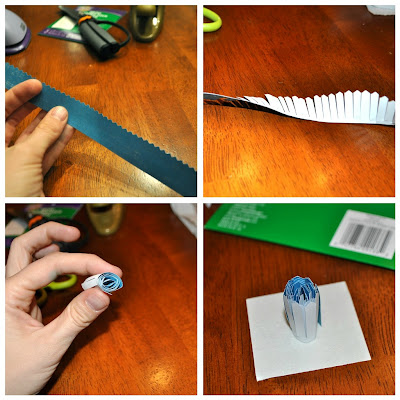
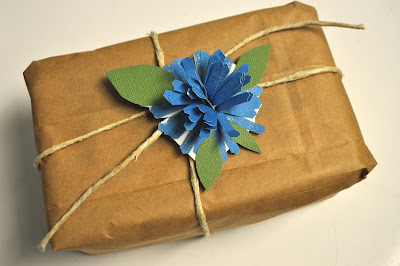
The second flower was done just like the felt flower I made HERE.  I cut a long strip of paper with pinking shears.  Then I cut slits down the entire strip and rolled it.  I cut a small square of Aleene's tacky double stick sheets for this one and planted the flower on it.  Both sides are sticky, so it essentially makes your flower a sticker to use when you want to.


I added a few leaves and trimmed off the sticker part I didn't need.


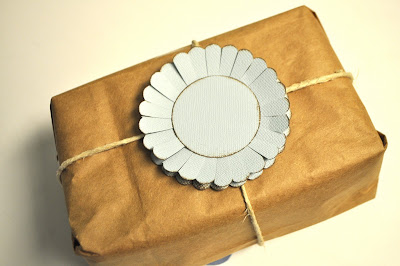
For the last flower I took a scalloped paper punch and cut out two of the circles.  I antiqued the edges of both and cut slits in the top one, curling the edges inwards a bit.  Then I made a smaller circle to go on top of it.  I used the tacky dots on this one as well.


It could even be a to and from tag.


And now it's time to start the Christmas shopping!


Easy Costume IDEA: Faux Tattoos!

Saturday, October 29, 2011

LINK

Visit your local craft store and pick up some Tulip Body Art and paint faux tattoos all over your body! Well, actually, have someone do it for you!

I recently painted my daughter, Maya, for the Tucson Home and Garden Show and it was funny to see all the looks that came her way. She felt like a transformed person in a new body and personality. Perfect for Halloween - and you can wash it off when the night is over!


Visit us on Facebook!
Craft on!

Dyed Fabric Looped Scarf by guest blogger Carly J. Cais

Friday, October 28, 2011
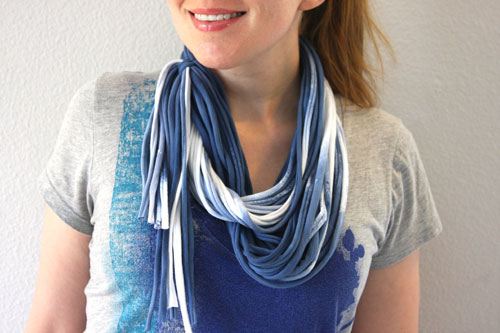
done3_loopscarf

A wonderful, versatile accessory that is lightweight enough as a Summer scarf, and will transition into the Winter months easily. You can even use a t-shirt that has a print on the front or the back, as long as it doesn't extend much below the underarms or prevent the fabric from stretching and rolling when cut. Remake and re-use an old tee out of your own closet for the ultimate in Recycling Chic!
done1_loopscarf

materials_loopscarf

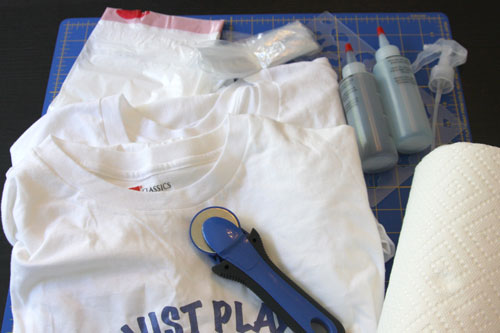
Materials:
Tulip® One-Step Tie Dye in Colbalt
Tulip® Craft Gloves™
– white t-shirt
– garbage bags
– rotary cutter and mat (or fabric scissors)

How To:
step1_loopscarf
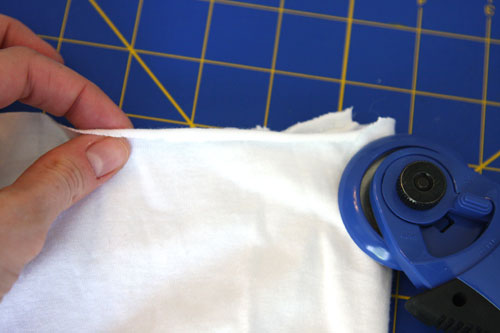
1. First check which way the fabric of your shirt rolls when stretched. (On most jersey cotton t-shirts, the fabric rolls to the outside, so you'll want to dye or paint the inside of the shirt.) Cut a tiny test piece from the hem (just a single layer of fabric), and pull the sides. Note which side is the exposed side when it rolls - which you'll place that side UP on the flat surface in Step 2).
step2_loopscarf
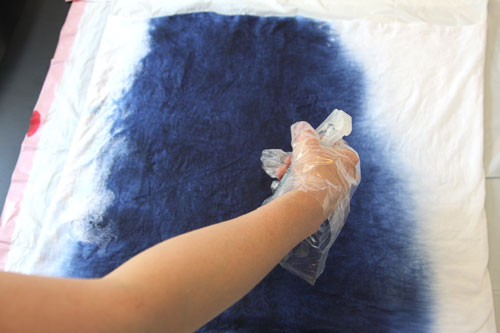
2. Begin by dyeing the t-shirt. For an ombre effect, the t-shirt must be wet, so wash in the washer (do not use fabric softener) and remove before putting into the dryer. Place onto a garbage bag, laid onto a flat surface. Place another garbage bag in-between the fabric layers so the dye does not seep through. Mix the Tulip Cobalt Tie-Dye according to the kit directions, and spritz onto the fabric using the spray bottle, concentrating in the center and allowing it to fade near the edges of the color. Turn the shirt onto the back and repeat, leaving an area of un-dyed fabric at the side. (Use the gloves that came with the kit to prevent dyeing your hands!)

3. Place another garbage bag over the top, and leave for 4-6 hours. Once dry, wash in the washer with a small amount of detergent and water at the hottest suitable for the fabric. Dry in the dryer.
step3_loopscarf
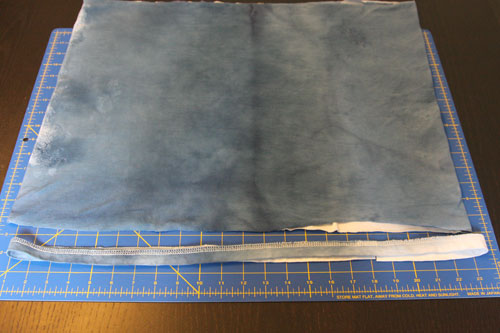
4. Place the dyed t-shirt onto a cutting mat. Cut off the bottom hem, just above the line of stitching.
step4a_loopscarf
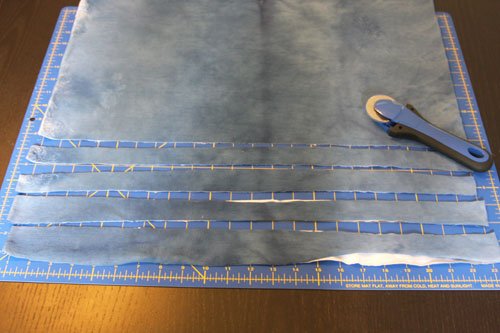
5. Use the rotary cutter to cut strips from the shirt, going from side to side, through both back and front, spaced about 1" - 1.5" apart. Go all the way up to the underarm area.
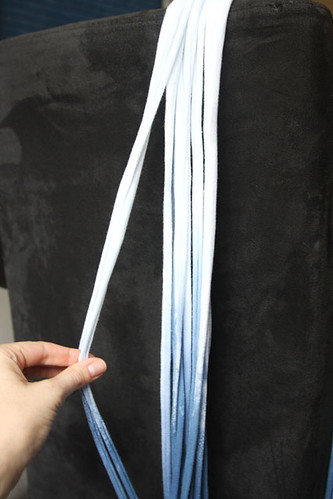
step7_loopscarf
6. Stretch each strip side-to-side so the fabric rolls.
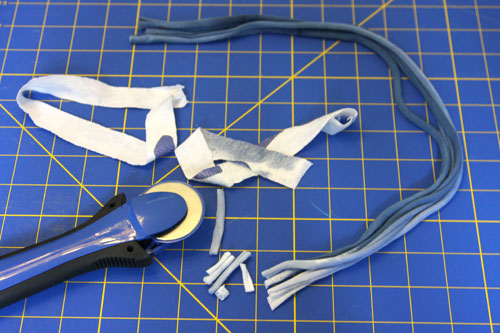
step6_loopscarf
7. You'll probably have one or two longer loops out of the strips you made, so save one and cut the other one/s into shorter pieces. Salvage the fabric from the hem, cutting off the stitching line, and stretching the fabric so it rolls. Cut into shorter pieces to match.
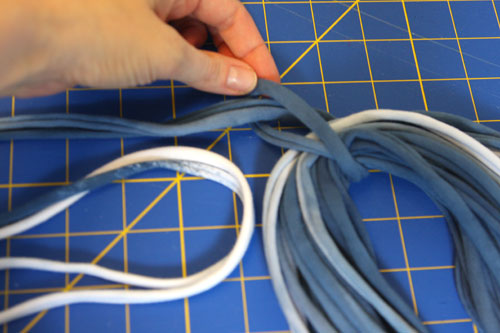
step8b_loopscarf
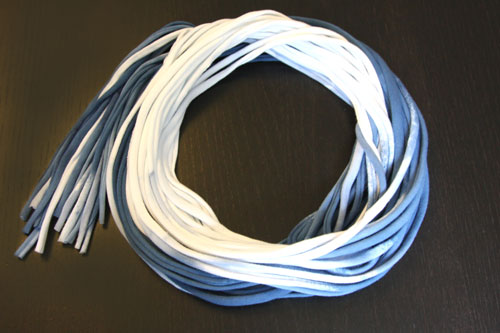
8. Gather all the loops and short pieces together, and line up the white areas.
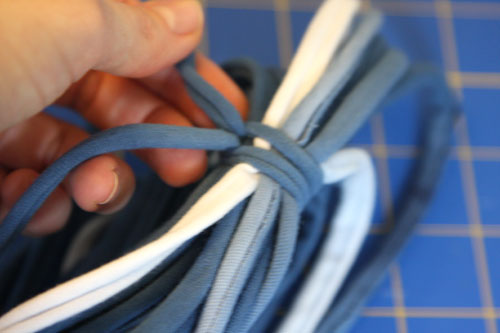
step8c_loopscarf
9. Use the one longer loop to wrap around all the others, tying it around itself. Pull the knot tight.
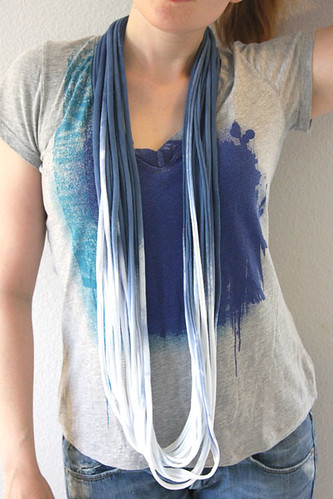
done2_loopscarf
You're done! You can wear the piece long, or looped twice around the neck with the short fringe at the side, or even wrapped three times with the fringe in the front. You can even jazz it up with iron crystals, nailheads, or fabric paint!

Visit us on Facebook!
Craft on!

Cool2Craft TV for October 31, 2011: Fashionista


Cool2Craft TV for October 31, 2011: Fashionista

Join host Linda Peterson for a new episode of Livin' the Creative Life TV on the Cool2Craft TV Channel. This week's show theme is Fashionista and Linda shares creative ideas from several recent road trips. Special guest Julianna Hudgins shows how to make funky wired dice beads and Linda shows how to use Tulip Markers to decorate a silk scarf and upcycles t-shirts into a pretty vintage inspired rolled rose using Aleene's Fabric Fusion Peel & Stick Tape. It's a terrifically tacky and creatively cool show!


It’s easy to watch the Cool2Craft TV Channel right from your computer. Airing Monday October 31, 2011 9am Pacific/10am Mountain/ 11 am Central/ Noon Eastern. Go to http://cool2craft.com and find the Livestream player and chat box. See you Monday!

Visit us on Facebook!
Craft on!

Doodle Art Scarves from the Southern Women's Show


Click here if you can't see the video above.

Two weeks ago I had the pleasure of demoing our awesome Tulip Fabric Markers at the Southern Women's Show. Here is a little video I made about the project I shared! Enjoy!


Visit us on Facebook!
Craft on!

iLoveToCreate team members go VIRAL!

Thursday, October 27, 2011


Congrats to iLoveToCreate team members Roque Rodriguez, a graphic designer at iLTC and Chloe Tatro, our copywriter! They helped create and star in a very DIY "Sweded" version of the Avengers movie trailer that has gone viral! Roque stars as Iron Man while Chloe stars as Black Widow. The Swede to date has gotten over 400,000 views in about a week and they've even been featured on G4's Attack of the Show and on sites like CNN and MTV!

So what exactly is a "Swede"? Here's the description according to the Swedefest web site!

A sweded film is a summarized recreation of a popular movie, starring you! The term comes from the 2008 film "Be Kind Rewind" directed by Michel Gondry, but it's really just another word for parody.

Two times a year, Roque and Brian Harley (who played Thor in the Swede), the co-founders of Dumbdrum.com host SwedeFest, a fun film festival here in Fresno! Check out their site and learn how you can submit your Swede for future festivals.

Here's a side by side comparison of the original Avengers trailer vs. the Sweded one! It's really cool just how close the two seam up. And to think they filmed everything for the Swede in just one day!


Visit us on Facebook!
Craft on!

Handmade Halloween Coloring Books


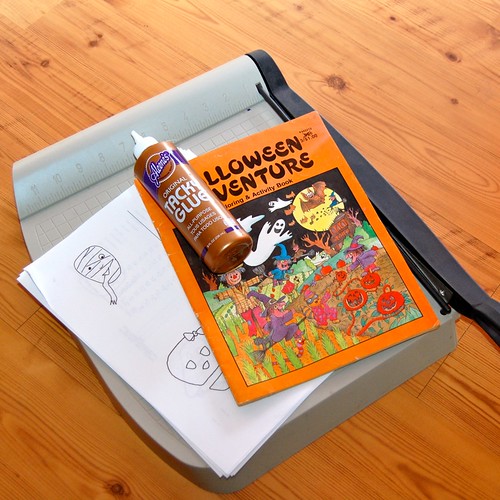
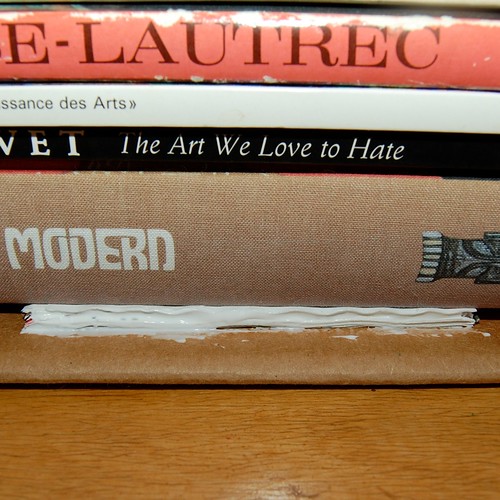
Did you know you can make your own notepad, coloring book, to-do list with just some Tacky Glue and paper? I didn't either until recently. My mom showed me a cute project in Country Living where they had made a weenie dog notepad doing not much more than cramming several pieces of paper together under a stack of heavy books and painting one edge with Tacky Glue. Always on the look out for purse size coloring books to have with me at all times in case of long restaurant wait emergencies I had an idea.


The first thing I did was scavenge online for cute Halloween coloring pages and my favorite embroidery patterns. These designs are by Vickie Howell. They look as cute colored as they do embroidered.


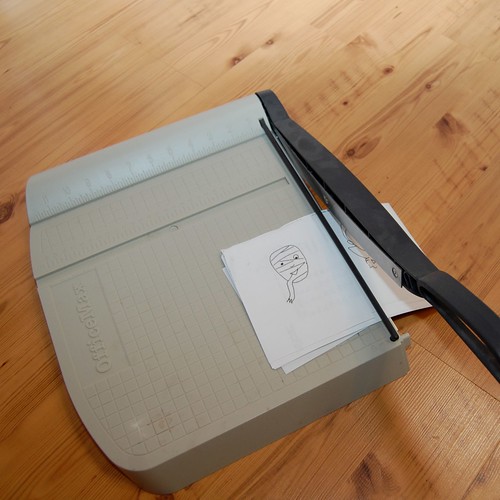
I printed the images four to a page and cut the paper into 4 squares using a paper cutter. I stacked my paper together into a neat pile and stuck it under several books.


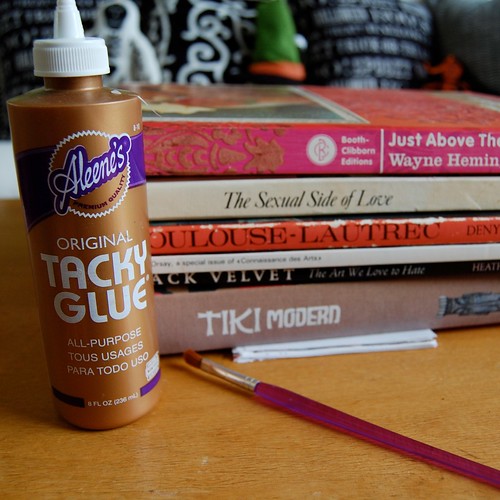
Once my coloring book was in place using a small paintbrush and tacky glue I applied several coats to what will be the spine. I allowed the glue to dry in-between coats.


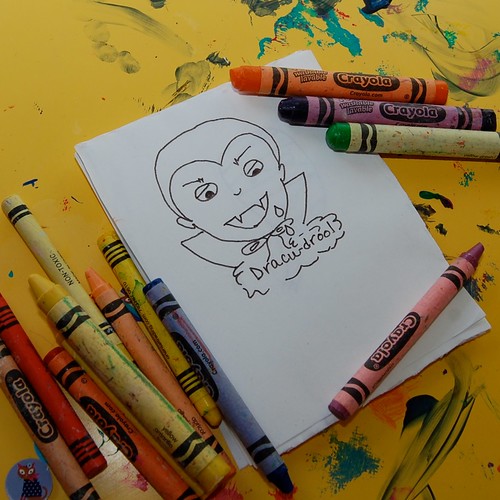
Presto magic a coloring book is born! Next I think I will make notepads for all the grandparents with my kids artwork water-marked in the background. Perfect handmade Christmas gifts.

Visit us on Facebook!
Craft on!

Day of the Dead Craft: Shrine on a Stick


Click HERE if you can't see the video above.


Visit us on Facebook!
Craft on!

All about Dia de los Muertos!

Wednesday, October 26, 2011
A
This week I'm kicking off my Dia de los Muertos project inspiration series!
Dia de los Muertos is a 3,000 year-old holiday from Mexico that celebrates the lives of those who have passed on. Sometimes it is at the gravesite, other times it is at home in front of an altar or ofrenda that we build for them.
CHECK BACK HERE EVERY DAY THIS WEEK FOR MORE PROJECT IDEAS!

Day of the Dead Timeline

Dia de los Muertos takes place over three days. Each day of the celebration has specific activities associated with it. Artwork by my husband, Patrick Murillo.

October 31

Infants and children who have died are angelitos, or "little angels." They follow the path of marigolds home, where their families have altars with pan de muertos, sweet tamales and sugar calaveras.

November 1

The angelitos must be gone. The offerings at the altars are appointed for the "faithful dead" or adult souls with pan de muertos, tamales, mole, cigarettes and tequila.

November 2

 Mummers run around town wearing masks to chase the stubborn souls back to the land of the dead.

Within the next two weeks, I'll share ideas for making your own ofrenda to making crafts to display. You will rarely see a scary skeleton. Dia de los Muertos skeletons are most often jovial and happy. Their spirit is still alive, even though their bodies are not here. 

Not all ofrendas have to have skeletons, they can be any way you like. Building a memory shrine to a loved one is whatever you want it to be. Set out their favorite foods, drinks, hobbies, photos and more.

You'll see a lot of sugar skulls - my favorite! The colorful icing represents the sweetness of life.

Here is the tag to see all the past projects and ideas. And stay tuned because I'll have new ones posted every day!

Also, here are other helpful links from http://dead.azcentral.com, a site I helped put together!


Visit us on Facebook!
Craft on!

iLoveToCreate Teen Crafts: Hallowe'en Jack-o-lantern Earrings

Visit us on Facebook!
Craft on!
Hallowe’en Jack-o-lantern Earrings
Margot Potter for Avalon Potter for iLoveToCreate

Avalon was busy with school this past week and I had some free time, so I agreed to make her project for her. We love Halloween around Casa de Potter, but Avalon isn’t into scary stuff. These little vintage jack-o-lanterns were so cute; they seemed like the perfect fit for a flirty seasonally apropos pair of earrings. Permission free images are easy to find and decoupage on Grungeboard allows you to create water resistant and lightweight jewelry. A little touch of Collage Pauge sparkly and some Glam it Up Crystal accents add the perfect dash of sparkle!


Materials
Grungeboard plain sheets
Permission free jack o lantern (image can be downloaded from here)
2 Small Glam it Up crystals
2 10mm silver tone jump rings
2 silver tone ear wires
Traci Bautista’s Collage Pauge sparkly
Traci Bautista’s Collage Pauge glossy
Aleene’s Fast Grab Tacky Glue

Tools
Hole punch (I used a Crop-a-dile)
Sharp craft scissors
Foam paint applicator tool
Computer with publishing software
Printer

Download this permission free pumpkin image to use for your project!


1. The image should be sized correctly, but if you want to print multiples you can size it and put it into publishing software before printing. Print a sheet with at least two jack o lanterns on it. Cut out two.

2. Use glossy decoupage medium to attach images to Grungeboard. Smooth any wrinkles gently with finger tip and allow to dry.


3. Use crop-a-dile to punch a hole in the top center of each jack o lantern.

4. Use sharp scissors to cut out dried jack o lanterns.


5. Paint two thin layers of sparkly decoupage medium on each earring. Allow to dry.

6. Adhere crystals to eyes using glue. Allow to dry.

7. Attach ear wires to earrings using the jump rings.

8. You can decorate the backs of your earrings as you wish, I painted some sparkly dimensional fabric paint on the back of mine.

For Halloween: Costume-on-a-Stick!

Tuesday, October 25, 2011
'Twas the week before Halloween and all through the haunted house,
every creature was stirring--

the zombies, the mummies, the vampires, the flappers, the secret agents--

even the mouse.

But if you're the one caught without a disguise,
make a costume-on-a-stick to cover your mouth or your eyes!


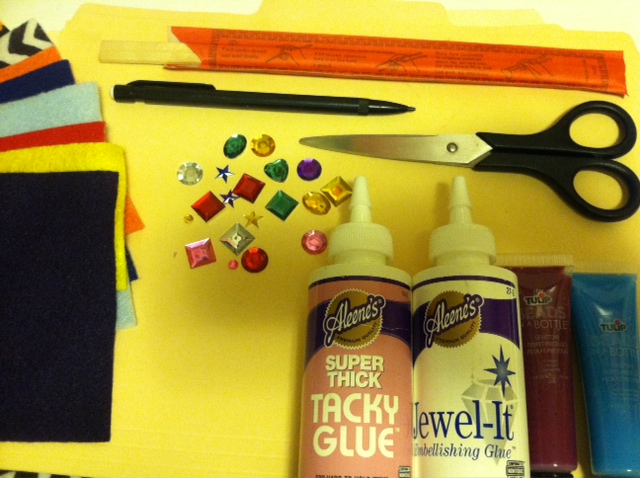
Materials:
-Pencil
-Paper (optional)
-Manila file folders
-Scissors
-Felt pieces in a variety of colors and patterns
-Aleene's Super Thick Tacky Glue
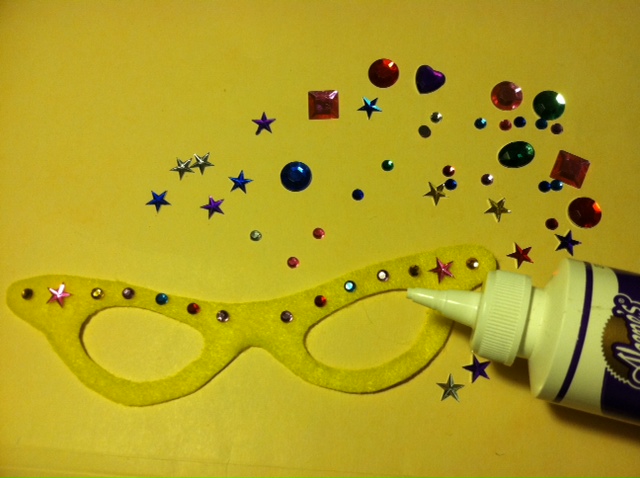
-Aleene's Jewel-It Embellishing Glue
-Fake jewels
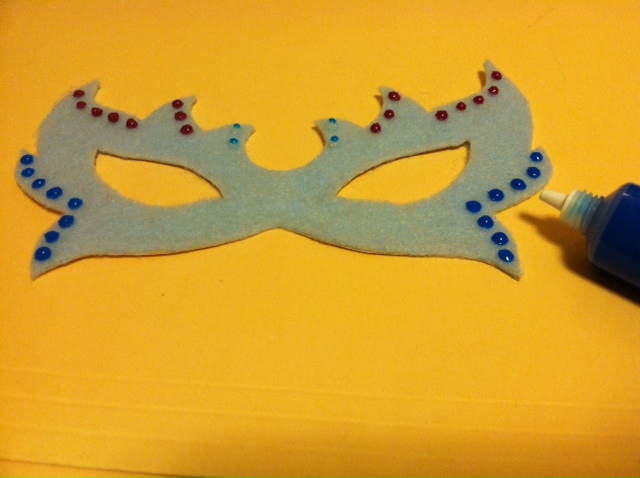
-Tulip Beads in a Bottle
-Wooden chopsticks


Make it:

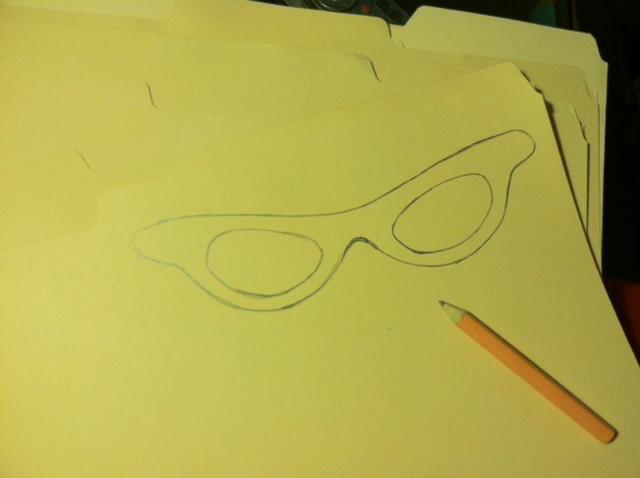
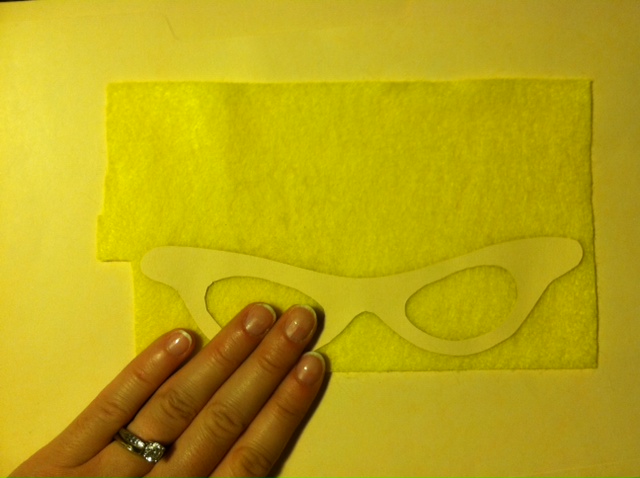
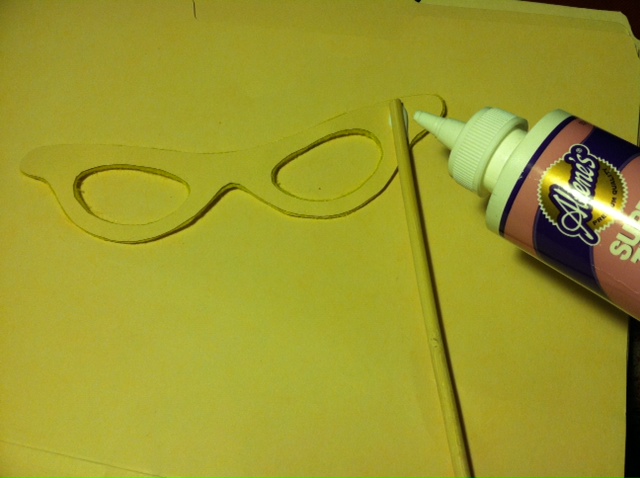
1. Draw the outline of a pair of glasses, a mustache, or other shape on a manila folder. Optional: Sketch it out on a piece of paper first to use as a template (this way, if it's a symmetrical shape, you can fold it in half to make sure both sides match), then cut it out and trace it onto the folder.

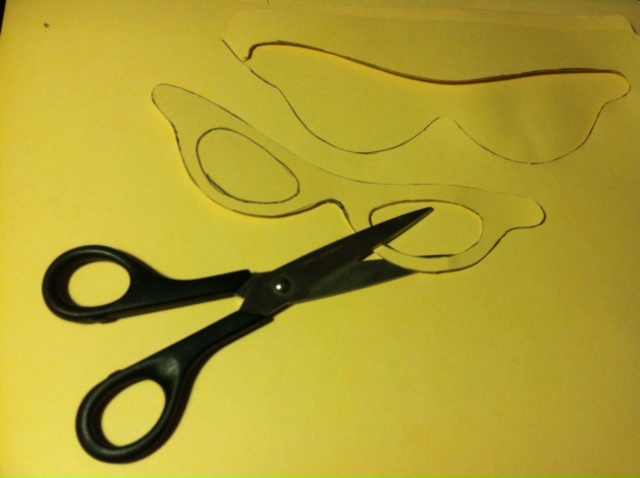
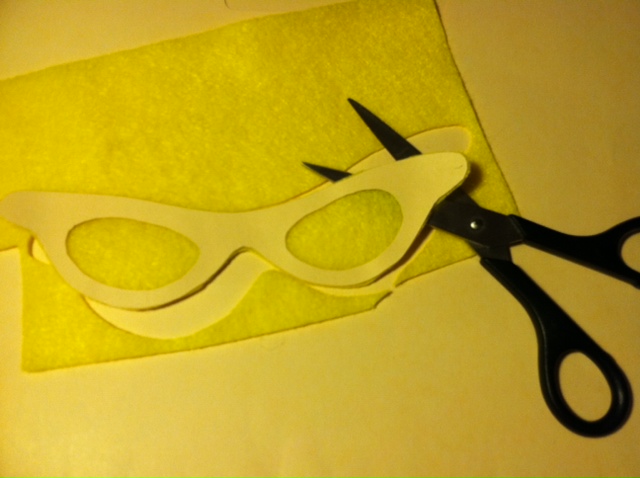
2. Use scissors to completely cut out the shape(s).

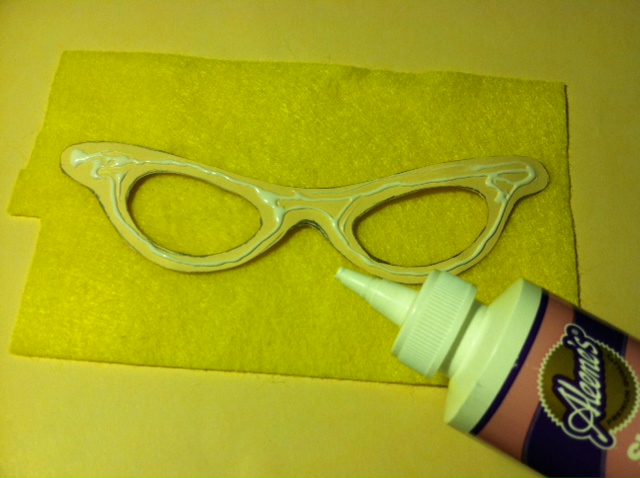
3. Spread glue generously over the back of the folder shape.


4. Press it firmly onto a piece of the desired felt color. Let the glue dry.

5. Cut out the felt piece, using the folder edges as your guide.

6. Use jewelry adhesive to decorate the front with fake jewels...

...or use Beads in a Bottle to create 3D embellishments! Let the embellishments dry.

7. Flip the disguise over and squeeze a line of glue along one side. Press the top of one chopstick so it extends vertically from the bottom. Let it dry.

8. Repeat as many times as you like to make cat-eye glasses (shown), wayfarers, masquerade masks, vampire fangs, and mustaches galore. Now what are you waiting for? Go undercover!

Happy haunting from Generation T!


Visit us on Facebook!
Craft on!