Showing posts with label Halloween decor. Show all posts

Retro Halloween Tabletop Decor

Monday, September 16, 2013
 
Paper mache cones lend themselves to all manner of retrofabulous DIY projects, like these DIY Retro Tabletop Decor objets d'art.  That's a fancy pants way of saying, stuff you can use to decorate for Halloween.  I like these cones because they can be interpreted a lot of different ways, as Halloween party hats, Halloween trees or if you add black cardboard circles to the bottoms and take the felt balls off of the tops, fabulous witch's hats!  There are so many yummy trims out there that would be perfect for these, from rick-rack to rhinestones to lace ribbon.  If you want to take this further, make each hat slightly different but color coordinated.  Add black glitter to give them a little more sparkle.  These make delightful tabletop centerpieces for a party!  Tulip Soft fabric paint works like a dream on the paper mache and dries to a perfect matte finish.  Tacky Glue and a glue gun make quick work of adding trim.  This is a great girl's night in project too.  Have a glass of wine while the glue dries and then dive right in!
Read more »

Baby Blocks that go Boo!

Thursday, October 7, 2010


Shopping for not so cheesy Halloween decorations can be a daunting task. Maybe there are people out there that don't want dismembered limbs laying about. That being the case we crafty types have to take matters into our own hands and create our own.


SUPPLIES
Decorative Ribbon
Clothes Pins
Crafty Chica Little Chica Paint Pack
Paint Brush (medium & tiny)
Decorative Chipboard
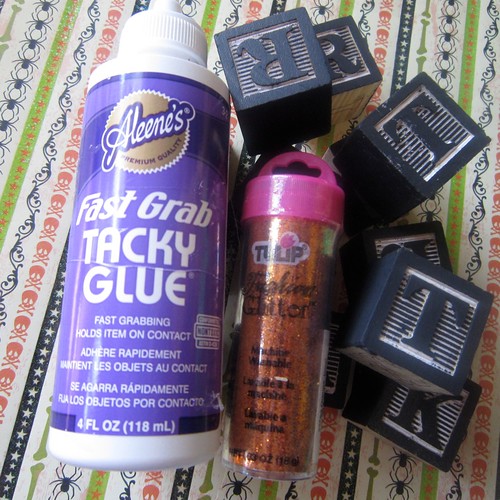
Tulip Fashion Glitter Orange
Small Glittered Skulls
Wooden Blocks
Aleene's Fast Grab Tacky Glue
Scrap Book Paper
Stapler
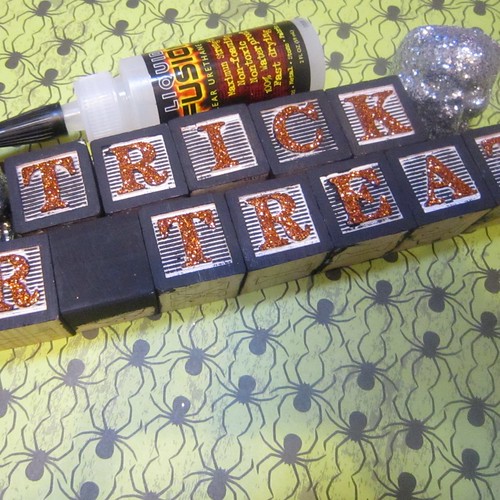
Liquid Fusion Glue
2 Small Pom Poms


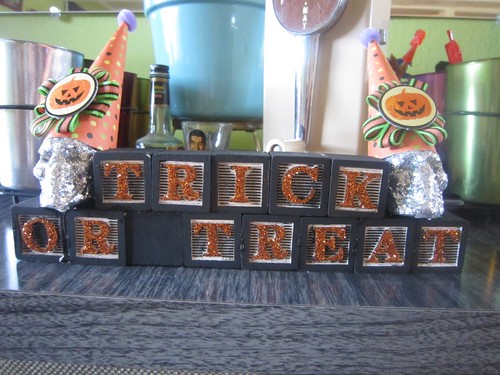
I have gotten a lot of bang for my buck on the bag of wooden baby blocks I bought at the thrift store. You might remember I also used them to decorate for Tallulah's 1st Birthday Party. This time around I painted the blocks black with Crafty Chica Paint. I coated the front of the blocks lightly making sure to just get certain parts of the block painted so that there would still be white showing.


Once the paint dried I went back with a tiny paint brush and covered each letter with Fast Grab Tacky Glue. While the glue was still wet I sprinkled Tulip Fashion Glitter in orange.


While my glue was drying I made party hats for my skulls. I used Halloween themed scrapbook paper, this template and Aleene's Fast Grab Tacky Glue to make the actual hat.


Next I cut 8 2"(ish) strips of decorative ribbon. Fold each ribbon in half and staple. Once you have all 8 done use Aleene's Fast Grab Tacky Glue to attach them all together to create a ribbon flower. I glued a small piece Halloween chipboard in the center. Use a clothespin to hold the whole thing together while it dries.


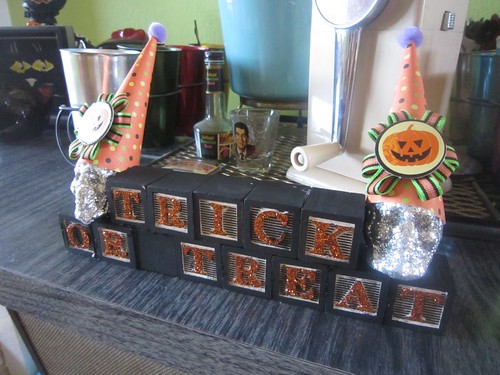
While my party hats were drying I used Liquid Fusion Glue to attach all my blocks together. I also glued my glittery skulls to either side of the block sculpture.


All that was left to do was attach my decorations to the paper hats and then attach the hats to the skulls. I used Aleene's Fast Grab Tacky Glue for both.


I displayed my new Halloween blocks alongside my black cat collection and a few of last year's I Love to Create projects like my Hiss Banner and Black Cat Bobble Head.

Have you been whipping up anything fun for Halloween this year? I'd love to hear about it.

Craft on!Click here for today's daily giveaway!

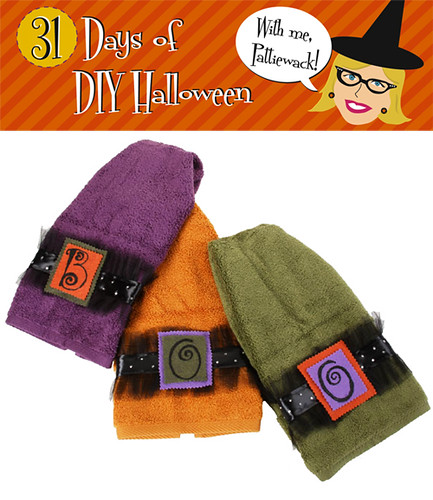
31 Days of DIY Halloween - Terrifyingly Terrific Towels

Sunday, October 3, 2010
halloween day 3
I totally want these in my bathroom and I'm hoping my guests will scream with delight over these Halloween towels! Turn ordinary towels into freakishly fun room accents with ribbon, felt and a little pizzazz from Tulip® 3D Fashion Paint™ and Tulip® Glam-It-Up!™ Iron-On Crystals™.

Terrifyingly Terrific Towels

Materials List:

– Aleene's® Fabric Fusion® Permanent Dry Cleanable Fabric Adhesive
– Tulip® 3D Fashion Paint™ in 65038 Black
– Tulip® Glam-It-Up!™ Iron-On Crystals™ in 23123 300 Clear Pack
– Felt – colors to match towels
– Sewing machine with black thread
– Satin ribbon – black – 1½” wide – 1 yard per towel
– Pinking shears
– Paper towels
– Toothpicks
– Tulle – black – ½ yard
– Foil
– White chalk sharpened to a point
– Crayon
– Towels – desired Halloween colors
– Sewing pins
– Ruler
– Scissors

Instructions:
1. Cut a 6” wide length from tulle. Double over, creating several layers and holding with pins as needed. Use machine to sew two rows of gather stitches down center. Gather up fabric to fit across one end of towel then pin in place on towel to secure.

2. Center ribbon right side up over gather stitches on tulle then sew through all layers down both sides of ribbon.
Measure and cut a 2½” x 2¾” piece from each color of felt using pinking shears to cut out. Use chalk to draw desired letter in center of felt as shown. Start flow of Black Slick paint on paper towel using an even pressure on bottle for a smooth line. Fill in each letter with a thick, even line of paint. Let dry.

3. Squeeze a thin bead of Fabric Fusion onto back edge of felt piece, smooth with fingers then press into a different color of felt as shown. Let dry then use pinking shears to trim excess felt, leaving a ¼” or so border showing.

4. Apply glue to back of felt piece, center over ribbon and center of towel then press in place. Repeat step with remaining towels. Let dry.

5. Squeeze a small puddle of Fabric Fusion onto foil. Working in sections at a time, use toothpick to add a small dot of glue for each crystal. Touch top of crystal with tip of crayon and position into glue – it will hold it just long enough to transfer crystal in place on glue. Repeat along length of ribbon on each towel as shown. Let dry.