Showing posts with label yarn. Show all posts

DIY Summertime Swirly Shoes

Wednesday, June 5, 2013

Hey everyone! It's SUMMERTIME! YAAAAAY! I found these cute kicks on clearance at Target for five bucks. (Score!) I LOVE the color, but since it's summertime I thought I'd make them pop even more by adding yarn swirls and gems. 


– Shoes
– Yarn
– Fabric Fusion
– Gem
– Cold Glass of lemonade (recommended!)
 Squeeze a quarter sized amount on to shoe. Pinch the end of yarn and apply it to the shoe. Next, simply wrap around in a spiral/swirl. Repeat until you get the look you want. I like the different sizes of circles that I ended up with!
Now add a little drop of glue in the center of each swirl and add a gem. You can do the matchy-matchy thing or add some contrast like I did.
I love my new shoes, they are so cute and are great for the beach or pool side parties! Now, where is that glass of lemonade??
Thanks for reading, I hope you liked my project! For more stuff, check out my Facebook page! http://facebook.com/mayainthemoment

MAYAINTHEMOMENT TEEN CRAFT: Yarn Wrapped Candles

Wednesday, February 20, 2013
Hey everyone! I LOVE candles. So I always have them around the house. And honestly, they aren't that pretty. You know what is pretty? Yarn! So for this project I wanted to make these candles look as good as they smell!(a little confidence boost...yeah?) :)
 SUPPLIES:
First, place the tacky strip around the candle and press down to seal it. Next, remove the paper to expose the tacky strip. Repeat this leaving a space between the top.
Then wrap the yarn around the candle. Make sure you leave about an inch from the top to avoid your yarn catching on fire! Other ideas: buttons, puffy paint, crystals, beads in a bottle etc!


4 Fun New Yarn Ideas - Cool2Craft TV with Heidi & Tiffany

Friday, February 1, 2013


Join us for a new episode of Cool2Craft TV on February 4, 2013 - the Cool2Craft team is sharing some fun yarn crafting ideas! Heidi is showing how to use Aleene's Fast Grab Tacky Spray to make a Yarn Votive & Pen Holder and Tiffany is crafting a Yarn Bracelet with Aleene's Tacky Dot Singles and Aleene's Turbo Tacky Glue.

Learn new techniques, chat with us while watching the show and ask questions about all your favorite Aleene's products!

Airing Monday February 4, 2013 9 am Pacific/10 am Mountain/11 am Central/Noon Eastern.

How do you join us? Go to Cool2Craft.com and you'll see the link to the Livestream player and chat box where you can join right in. See you in the chatroom on Monday or drop by anytime this week to watch these cool video tutorials!

Visit us on Facebook! Watch our video tutorial archives on YouTube! Get creative! Get inspired! Be cool!

CRAFTY CHICA: How to Dye a Skein of Yarn! (video)

Wednesday, June 6, 2012
 Have you ever felt like dyeing your own skein of yarn? Maybe rainbow or ombre? Here is how you can do it with a Tulip Tie Dye Kit. Easy peesy!


LINK Visit us on Facebook!

VIDEO TUTORIAL: How to dye fabric with yarn!

Tuesday, May 29, 2012

 Check out the video tutorial below!


 LINK TO VIDEO

Regular old tie-dyeing can get boring. not all of us are into the hippy style, you know/ I like to experiment and come up with non-traditional ways to use fabric dye. This is a good one - it's great for kids or people who just like to play and experiment!

What you're doing is soaking cotton yarn, holding it tight between your fingers and then pressing onto damp fabric. It gives a bit more control that just using the squeeze bottle.

You'll need to pick up a Tulip Tie Dye Kit and either cotton swatches or shirts, etc. Check out the video to see the full technique!

Here are some clutches I made using my fabric scraps from this experiment. I have the tutorial posted here.
Visit us on Facebook!
Craft on!

Creepy Creature Canisters

Thursday, September 29, 2011


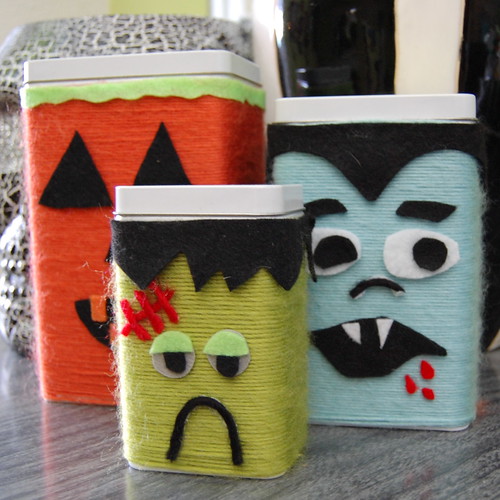
Excuse last week's neon bachlorette interruption, it is back to all Halloween all the time around here. This week for I Love to Create I present you with some creepy creature canisters.


SUPPLIES
Set of Canisters
Sheep (ish) yarn
Felt
Scissors
Aleene's Tacky Glue

I love recovering old canisters and making them into something new. Remember my wallpaper covered canisters from last year? This time I went the yarn route. I had a set of 3 canisters from Ikea just waiting to celebrate Halloween properly.

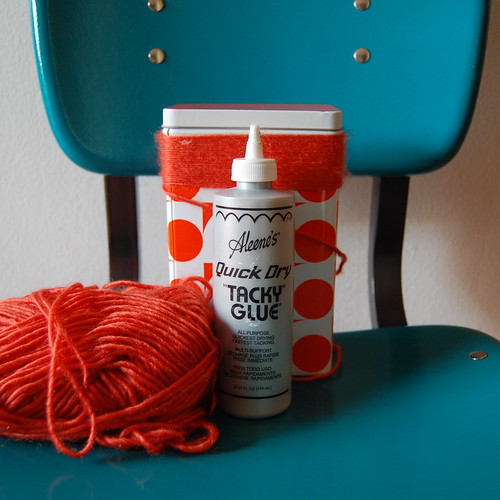
This project is so super duper easy. All you need are some canisters which I see regularly at the thrift store. Round or square will work. Next you will need some Tacky Glue, my preference is some sort of fast grab. I am in love with the colors in my friend Vickie Howell's new yarn line Sheep(ish) so I grabbed a ball of blue, green, orange and got to wrapping.


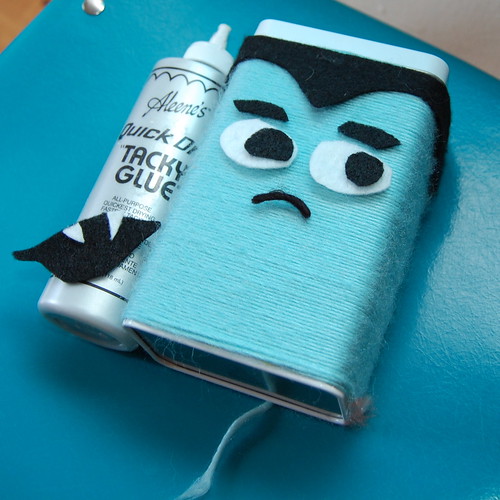
Starting at the top or the bottom wrap your entire canister in yarn. You will need a dab of glue when you finish to keep your yarn from unravelling. I wrapped the starting piece of yarn to hold it in place.


Once your canister is totally wrapped it is time to adorn with felt and more yarn. You could use white yarn for ghosts or mummies, brown yarn for werewolves, green yarn for witches - the options are endless. Now what kind of sweet treats shall I put in my canisters?


Check out more Halloween fun here and more I Love to Create posts here.


Visit us on Facebook!
Craft on! Click here for today's daily giveaway!

Yarn Wrapped Antler Mobile

Thursday, June 9, 2011

When my dear friend Vickie Howell asked me to be a part of her blog tour to help promote her new line of yarn Sheep(ish) I said "hells to the yes" and then gulped about what I was going to make. My crochet skills are minimal at best and I make clocks out of knitting needles. What was I going to do with yarn? Once I got my hot little hands on a stash and saw all the fabulous colors my mind started churning. Caron sent this cute little embroidery hoop with "yarn swatches" from the line. I kept staring at all the colors and then I started waving the embroidery hoop in front of Baxter and he seemed to enjoy it even more than I did. Clearly I was not going to be whipping up a pair of booties with the yarn so I thought of another way Baxter could enjoy looking at the yarn - a mobile! All I needed was an antler and I was ready to roll. Yup, I said antler.


SUPPLIES
Small Antler
Pom Pom Maker
Aleene's Fast Grab Tacky Glue
Drill
Vickie Howell Sheep(ish) yarn
Scissors
Clear Fishing Line
Large Eye Plastic Needle
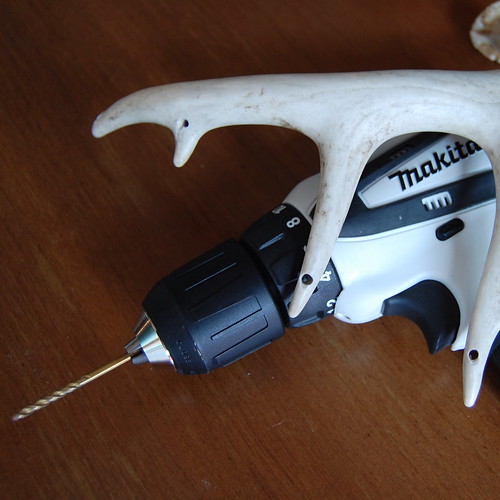

The first thing to do is drill holes in your antler. I recommend doing this outside as it can be kind of stinky. If you have issues with using an antler you could also use a branch. I drilled a hole in each of the points of my antler.


Using the short yarn samples from the embroidery hoop I started wrapping and gluing them to my antler using Aleene's Fast Grab Tacky Glue. The Fast Grab part is important or you could be holding yarn in place while your glue dries for a very long time.
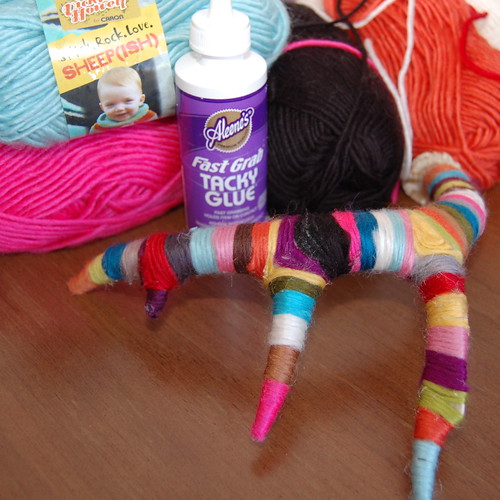

I wrapped and glued and wrapped and glued until my antler was entirely covered with yarn stripes.
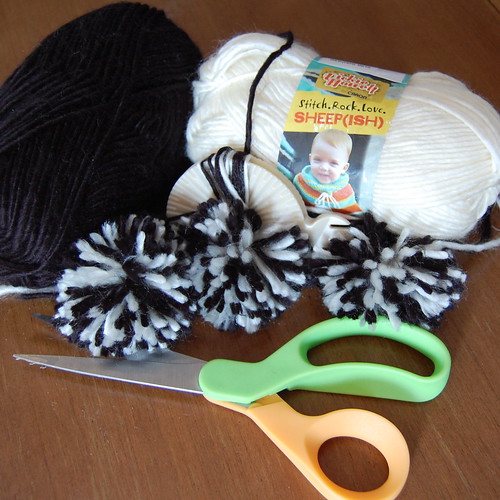

Using black and white Sheep(ish) yarn, a pom pom maker and scissors I made 4 pom poms to hang from the points of my yarn wrapped antler.
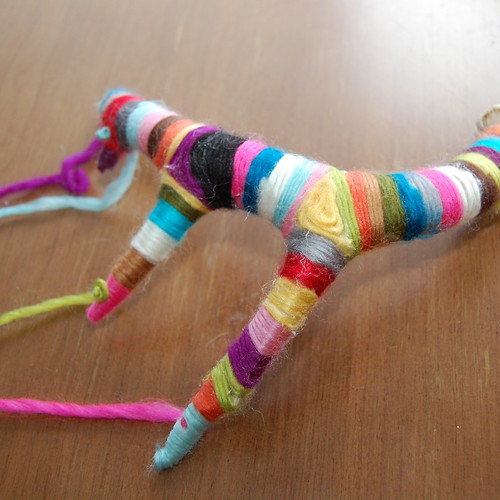

Using 4 different colors of Sheep(ish) yarn cut at 4 different lengths I strung them through the holes in my antler and tied a knot on the end. I used a large eye plastic needle for stringing. I gotta tell ya at this point I was tempted to just keep this on my kitchen table as a centerpiece it looked so colorful and arty.
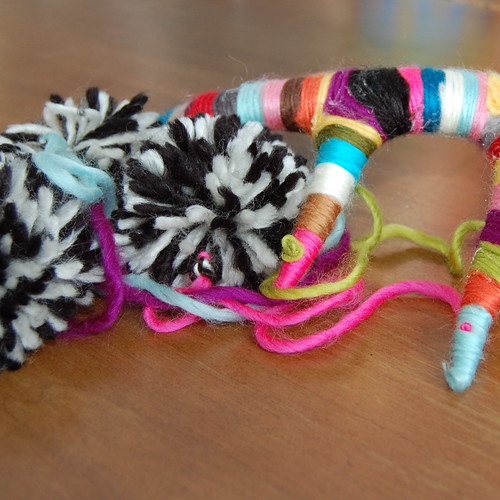

Once my long yarn strings were attached to the mobile I tied them to my black and white pom poms.
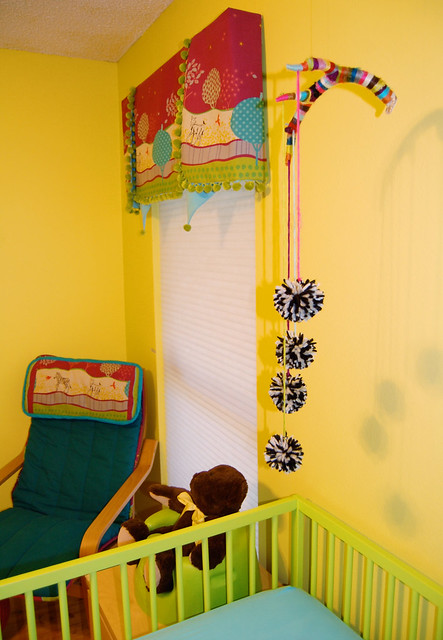

The last step was to tie some monofilament around my antler so that I could hang it from the ceiling.


Baxter seems to enjoy his new mobile and spent a good 15 minutes laying bed looking at it this morning which in baby time is like hours.


The Sheep(ish) blog tour continues tomorrow on Craft Zine. Check out more of my I Love to Create projects here. Also check out all these free patterns on Vickie's blog you can make with Sheep(ish).

Visit us on Facebook!
Craft on! Click here for today's daily giveaway!

Mid-Century Modern Knitting Needle Clock

Thursday, April 7, 2011


A few years ago I was on the hunt for the perfect mid-century modern clock.  I wanted something atomic, colorful and unique.  Actual vintage clocks can be pricey and often times don't work so I thought about how to make my own.  On a trip to the Round Top flea market I saw a dealer selling oodles of colorful knitting needles and it all became clear to me.


SUPPLIES
Knitting Needles
Wooden Disc
Clock Face
Saw
Pen
Yarn
Clock Mechanism 
Wooden Balls
Dremel Tool


You might recognize this clock face as it has made a crafty appearance on the blog before as a picture frame.  I decided it was better suited for it's original purpose in life, a clock.

My mom helped out quite a bit with this project since she lives for any excuse to use her power tools.  The clock needed a backing so we used a piece of board I had in my studio.  We traced the clock twice and using a small saw cut out the wooden circles.


Once we were sure the circles would fit up inside the clock face (look at the thrift store to find one) we also needed to cut out squares in the center to fit the clock mechanism inside.


We attached the two circles together using Liquid Fusion Glue and also glued them inside the vintage metal clock face.


Using the cutting tool on a Dremel we removed the metal tips of 4 of the knitting needles.


Where the metal tips once lived we glued on wooden balls.  Some of the holes were not the right size for the knitting needle and so using a drill we bore out the holes to make them larger.  Once the beads fit on the knitting needles we attached them with Liquid Fusion Glue.


Lucky me my friend Vickie Howell has the mother load of Caron yarn and was nice enough to give me a few skeins to do fun things like crochet and make clocks with.


The 4 wooden ball tips were wrapped in yarn and held in place with a dab of Liquid Fusion Glue.


Using a Dremel we drilled holes the size of our knitting needles all the way around the edge of our clock into the wooden discs.  We placed the 4 knitting needles with yarn wrapped balls at strategic points.


Using Liquid Fusion Glue we inserted the rest of the needles all the way around the clock, trying to keep them spaced out evenly.


Once the glue had dried I set the time on my clock and hung it on the wall in my dining room.  Now I have my very own customized mid-century modern clock.


Wanna see some more I Love to Create Projects?  How about another clock project involving vinyl records and silk screening? 


Visit us on Facebook!
Craft on! Click here for today's daily giveaway!