Inside the iLoveToCreate studio via Instagram
Saturday, April 27, 2013 at 7:30 AMThere's always a lot of action going on in our studios on a daily basis! This past week, there was a whole lotta tie dye going on, as well as a couple photo shoots. One of the mom's of a model who came in brought this pretty conure. We had to put him on a tie dye shirt and he also left a present for us on said shirt. Haha. Oh, and by the way, he was born with his little feet that way, so nothing is wrong with him if you were wondering.
Lauri dip-dyed this shirt from Forever21. She used the Tulip One-Step Tie-Dye in coral. It left it a cool purple tone!
We are making shirts in the studio using various products that can be mass-produced for shirts to be displayed in stores. This neon shirt is using Tulip Fabric Sprays.
Pattiewack was painting Tulip One-Step Tie-Dye on specialty paper for an upcoming tradeshow. The colors are so full and rich!
During our sales and marketing meetings, we all bring a craft to work on! Alexa is working on a new Puffy Paint Canvas in honor of PUFFY PAINT! See what she's going to do with it in this blog post.
We're decorating our human resources area with bright and vibrant pieces that we've created for our web site. This rainbow-covered stool is so bright and cute...find the instructions to make it here.
And finally, we, once again are mass-producing shirts for retail stores! We think we've hit the BULLSEYE on this one.
Tie Dye Your Summer + Enter to Win an iPad/Tulip Prize pack
Friday, April 26, 2013 at 12:41 PMWe are so excited about our brand new Tie Dye Your Summer web site! The site is packed with tons of cool inspiration, step by step instructions, videos, and giveaways each month. It's the one-stop place for all things TIE DYE and we hope you'll join us for the fun!
Here's just a few of the many things you will see when you visit the site...
We're running two awesome Tie Dye Giveaways! For both giveaways, you can win an Apple® - iPad® mini Wi-Fi - 16GB with Tie-Dye Skin and supplies to throw your own Tulip® One-Step Tie-Dye party. You can enter in the form below -or- enter using Instagram. All the contest rules and details can be found on our giveaway page!
a Rafflecopter giveaway
Click here for Tons of how-to's and inspiration. Learn the basics of tie dye (prepping, rinsing, and washing) as well as all these fabulous techniques. The instructions are shown in clear, easy-to-follow photos along with lots of projects using that technique. And we've also compiled an informative list of frequently asked questions tie dye questions that will make your project the best it can be.
You might just want to try out the spiral technique! So much of the fun of tie dye is the "MAGIC" reveal when you see the how your dyed item turned out!
Learn all about the history of our Tulip One-Step Tie-Dye Van. You'll also find info on our Tie Dye Tour down the California Coast this summer along with dates and photos of our appearances. Learn more on our Follow the Van page.
Planning a tie dye party? We have a great video and detailed steps to plan a fun afternoon with you and your friends! Click here to find all the Tie Dye Party Planning details!
We hope you'll take a look at the site and that it will inspire you to TIE DYE ALL THE THINGS!
Planning a tie dye party? We have a great video and detailed steps to plan a fun afternoon with you and your friends! Click here to find all the Tie Dye Party Planning details!
And finally, on our product page, you can see our brand new Tulip® One-Step Tie-Dye packaging! It's so eye-catching and fun.
We hope you'll take a look at the site and that it will inspire you to TIE DYE ALL THE THINGS!
Tie Dye an Upcycled Skirt
Wednesday, April 24, 2013 at 7:05 AMI did it! I actually tie dyed something! Alert the media! Though this upcycled thrift store skirt isn't everything I had in my mind's eye, I think I'm on to something fun. I plan to explore this idea further. Creativity is a process and we can't be worried about getting everything right on the first try, because that's bound to be disappointing. I don't believe in "craft fails" as much as I believe in craftortunities. With a little work and some more fine tuning, these bulls eye style tie dye flowers could be very, very cool. It's my goal to take tie dye into a new direction over the next few months and these saturated, colorful, fabulous Tulip dyes are the perfect way to do that. They have made it so easy to tie dye, anyone can do it, even me! Read on to find out how I turned a $2.00 thrift store white eyelet skirt into a vibrant tie dyed creation.
You will need:
White eyelet 100% cotton skirt
*Tulip Tie Dye in Orange, Pink and Yellow
Tulip Fabric Markers in Black, Neon Yellow, Neon Orange, Neon Pink
*Rubber Bands
*Gloves
*Plastic Sheeting
Plastic Bag
Washing Machine
(*All starred items come with Tulip tie dye kits)
1. Gather your materials, be ready to rock and roll before you add water and mix the dyes. WASH skirt to remove sizing or fabric softener. 2. Follow instructions to mix. 3. Wet skirt before dyeing. Tie off skirt by grasping and twisting small sections, band, twist again and band. Repeat to make these small twisted sections across bottom of skirt. 4. Add lighter dye to center of each section.
5. Add orange to bottom sections. 6. Wrap entire skirt up with more rubber bands and add pink. Wash and dry following instructions. 7. Grab some markers! 8. Turn bulls eye sections into flowers using black marker. Add some butterflies if you like too!
Next time, I'm thinking of dyeing the fabric a soft color first, then doing a monochromatic tie dye. I may go back and over dye this skirt pale pink. I'm also visualizing just the flowers with out any extra dye or patterns around them so they create fun and colorful splashes of color on a blank white canvas. I'm also thinking of using the resist dye to prevent the dye from getting anywhere I don't want it to be. Are you a tie dye fan? What kinds of tie dyed projects would you like to see? Do tell! Visit iLoveToCreate.com and DIY Doyenne to find more DIY, style and fashion inspiration.
(PS: Don't forget to enter to win a iPad Mini and a Tie Dye Party!)
Decorate an Umbrella with Fabric Paint!
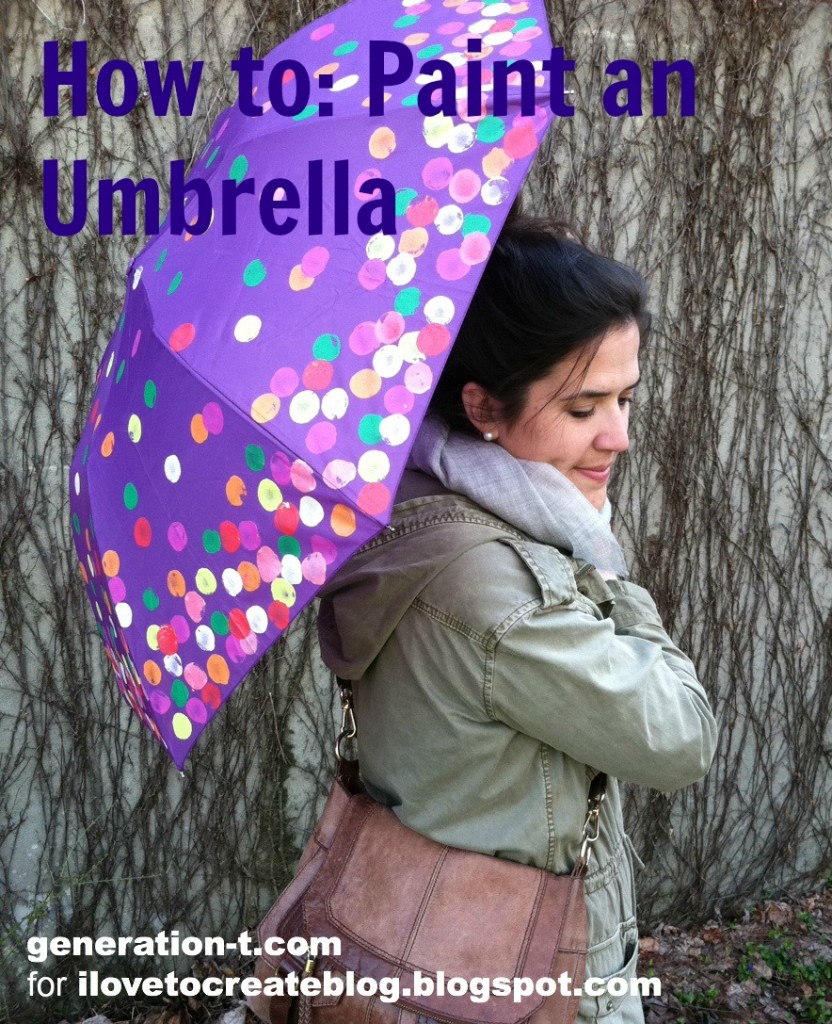
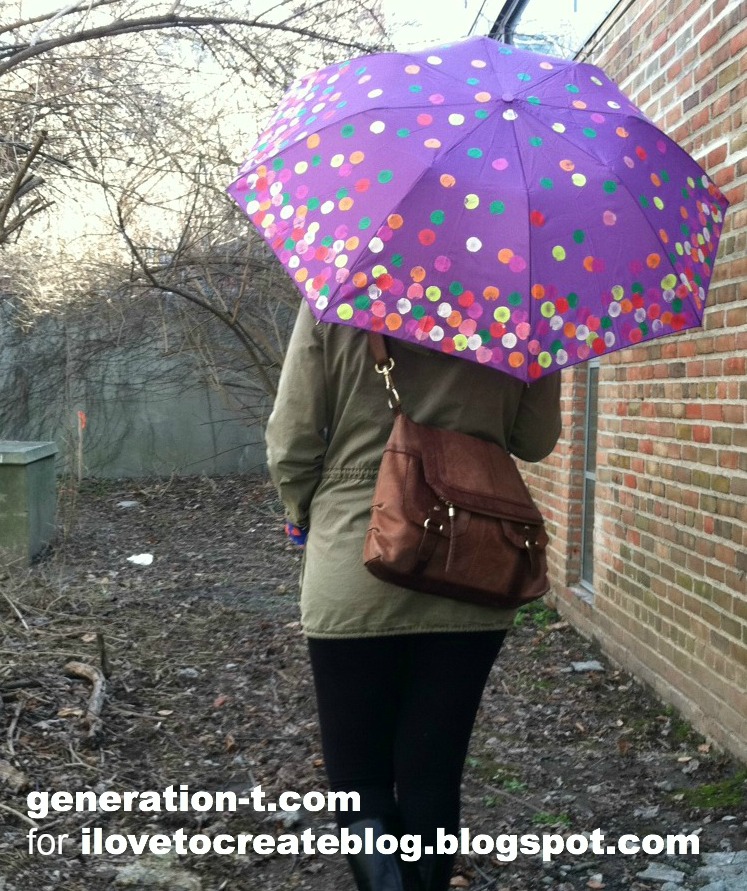
Tuesday, April 23, 2013 at 10:17 AMThey say that April showers bring May flowers. And in some parts of the country this year there've even been April flurries to herald in the blooms! While Mother Nature keeps us on our toes, here's a colorful springtime project that really brings the flowers when it rains. It's just one of a slew of ways to decorate an umbrella with paint (because let's face it, sometimes a purple umbrella isn't quite bright enough). It's part pop art (a gumball machine!), part impressionism (Monet's gardens at Giverny) -- and a whole lot of color to brighten any dreary day! We often think of fabric paints in the context of T-shirts and other wearables, but it's fun to experiment with paint on other fabric-based surfaces: embellished pillows, couches, canvas director chairs, curtains, and...umbrellas!
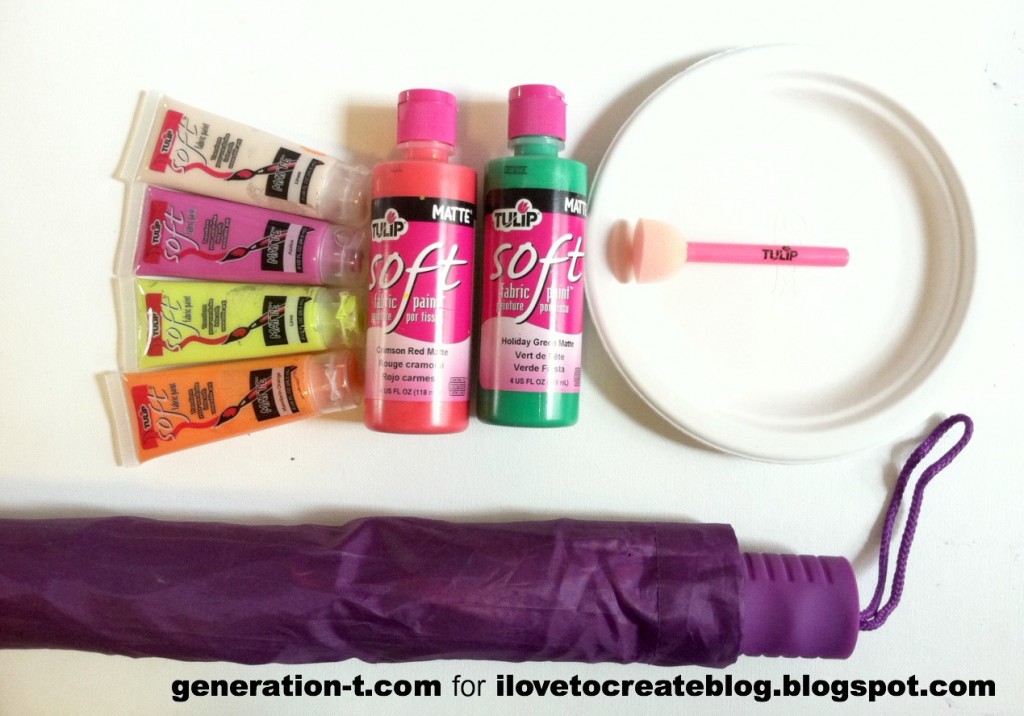
(I used Azalea, Lime, Mandarin Orange, Linen, Crimson Red Matte, and Holiday Green Matte)
-Tulip Sponge Pouncers (foam paintbrushes)
-paper plate (to use as a paint palette)
-Tulip Sponge Pouncers (foam paintbrushes)
-paper plate (to use as a paint palette)
Check out the how-to video I did for About.com, or scroll down to follow the step-by-step photos.
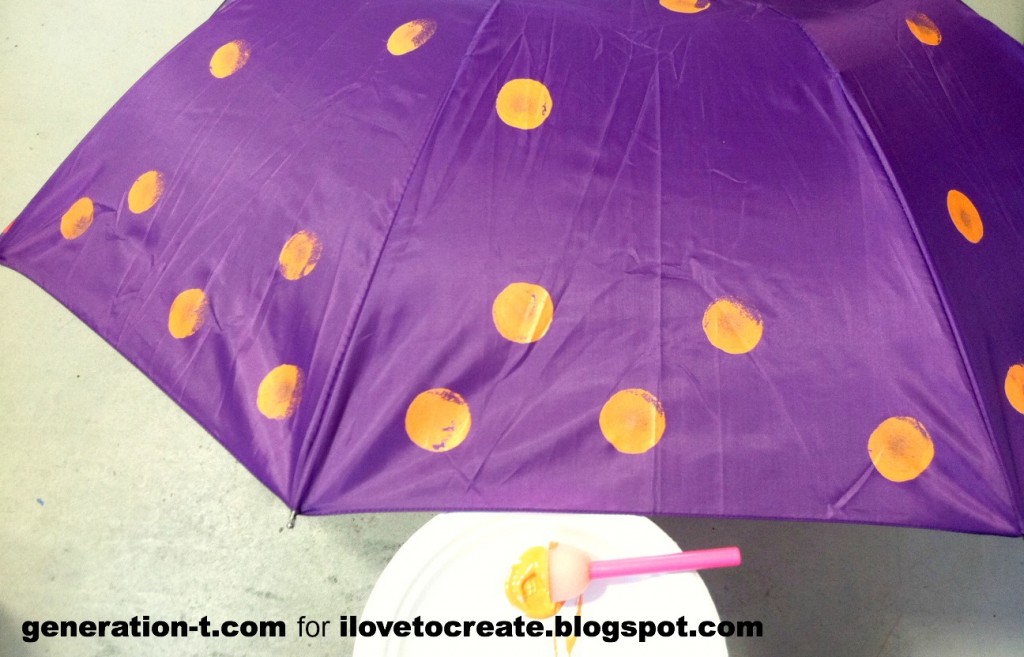
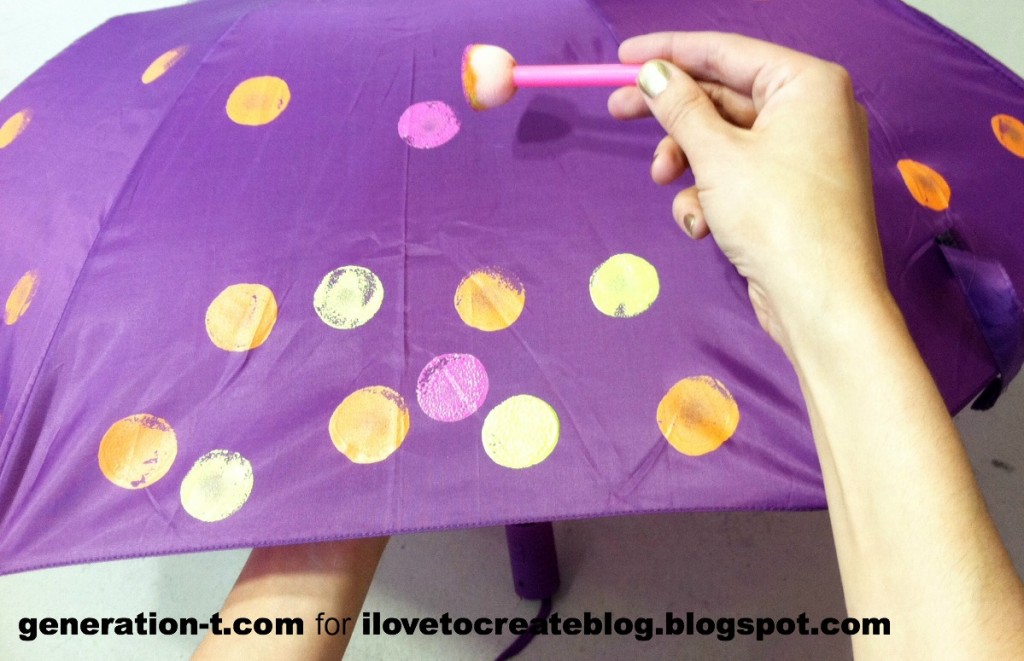
Open the umbrella (I know it's considered bad luck, but you'll have to get over it -- or take the project outside if the weather's nice!). Squeeze one paint color onto your palette and use the pouncer to start making dots around the perimeter of the umbrella. Make them close together at the bottom of the umbrella and space them farther apart toward the top.
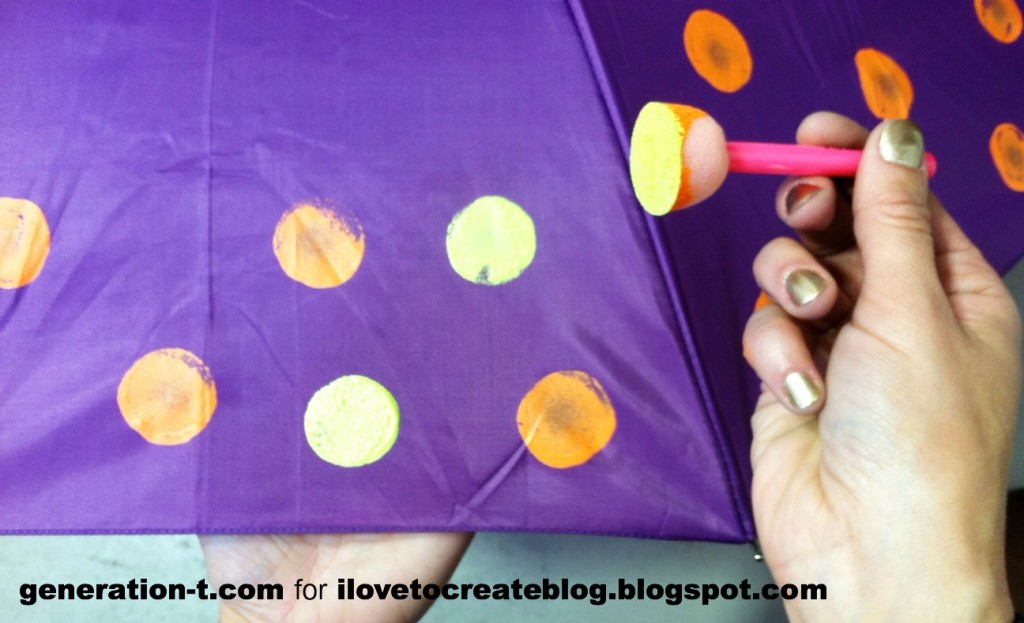
Wash and dry the pouncer before changing colors, or start with a fresh brush. Squeeze out a new dollop of paint and press dots around the base of the umbrella, interspersed with the first color. Reinforce the fabric surface on the inside of the umbrella with your other hand (just slide it under, palm up).
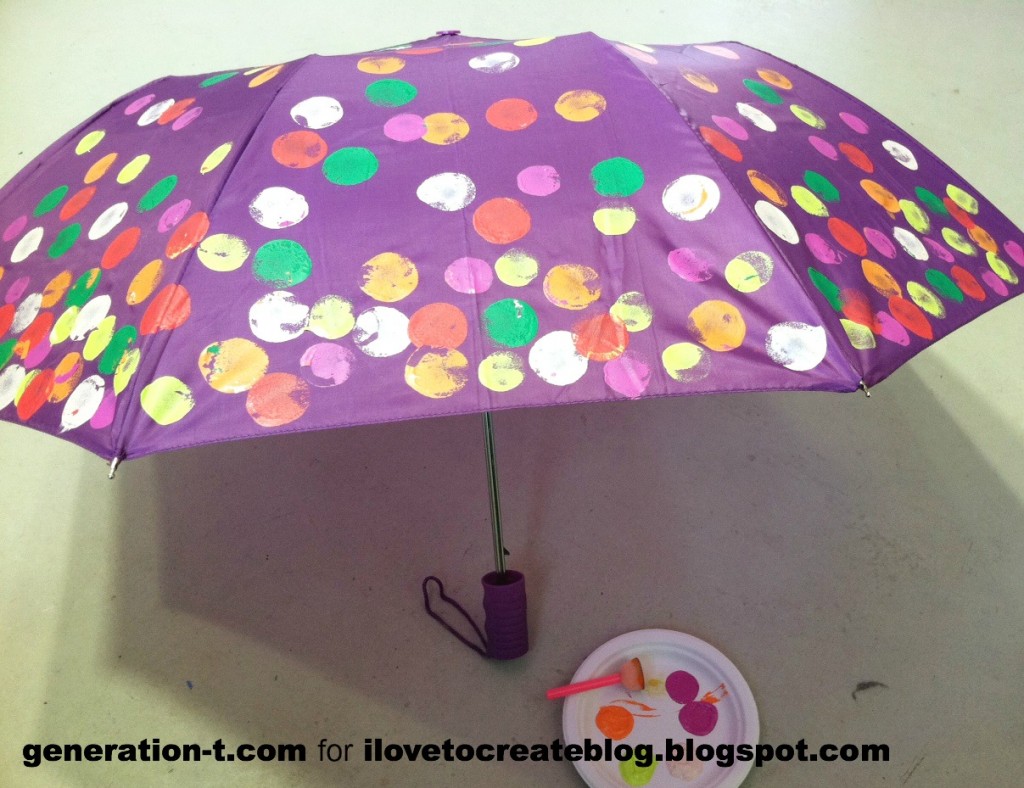
Continue to add colors the same way, and your "garden" will grow more and more lush. It's repetitive, but incredibly meditative, too!
When you've added all of your colors, let the umbrella fabric dry completely. Now that you've completed this "rainy day activity," you can take part in a new one: go outside with your umbrella and jump in the puddles!
It's a nice vibrant splash of color while we wait for the flowers to poke through.
Body Art Birthday & House Warming Party
Monday, April 22, 2013 at 9:36 AMWe had the most fun at my Girlfriends combination 50th Birthday and Home Warming party this past weekend. I thought it would be oodles of creative fun if we painted each others faces and one belly with Tulip's Body Art kit.
But first we did a little doodling with Tulip's Fabric Markers. I so love these markers!
Arielle & Tess got really quite and serious while creating their Inspirational statements on this bandana that I purchased from Michaels Craft stores.
I love the intense look on Tess's face! These girls are super talented!
We continued to add more artwork through out the night. A really fun and inexpensive way to create and give a gift all at the same time.
Smile...Your Beautiful!
Next it was off to Tulips Body Art. I must say that everyone was super eager to paint someone's face, belly or arm. It was so much fun to watch.
The Birthday Girl and her Lovely daughter Tess picking out a design to paint on momma's face.
It was so sweet watching these two.
She did a GREAT job, it was so easy and quick!
We all picked Kaileen as the perfect candidate for a silly Mustache.
She ROCKED it big time!
Watching these two almost Newlyweds paint each others faces was beyond Hysterical!
Not bad......its a Tulip, Tracy's favorite flower.
This girl has "Mad Skills" and she did it so quick!
Santos, you are such a "Doll Baby", hehe! So cool!
Hey its called Tulip Body Art, Do my Belly!
Love how Arielle incorporated Natalie's belly button ring as the nose and mouth for her smiley face!
Hey...Whats that crawling on your forehead? Tess's friend Sam pull out her own free hand painting skills with this Pinterest inspired image of a snail.
and then it was my turn!
Great job Kaileen! Love my sunshine.
Needless to say a great time was had by all! We are definitely taking our Tulip Fabric Markers and Body Art to the Jersey Shore this summer. In fact we are already brainstorming on quick and easy images that we can paint for each day. Don't worry I am sure there will be a Blog entry featuring that crazy trip! Enjoy! Jewels
Subscribe to:
Posts (Atom)