Easter Bunny House

Thursday, February 28, 2013

Easter is right around the corner. Are you ready? Sure St. Patrick's Day comes first, but they are only separated by a few weeks so I'm going straight to bunny town.

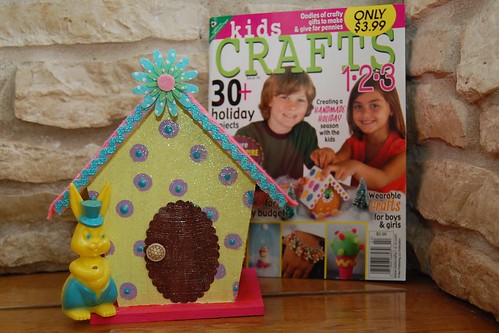
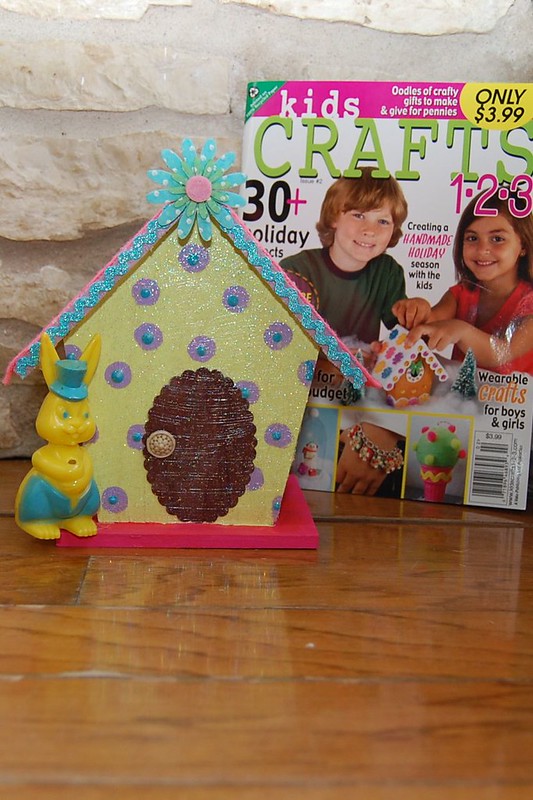
One of my favorite designers that regularly contributes to Kids Crafts 1-2-3 is Karen Sierre of Midwest Maude. For Issue #2 she converted a little wooden bird house into a gingerbread house. I decided to take her idea and tweak it into an Easter Bunny house.


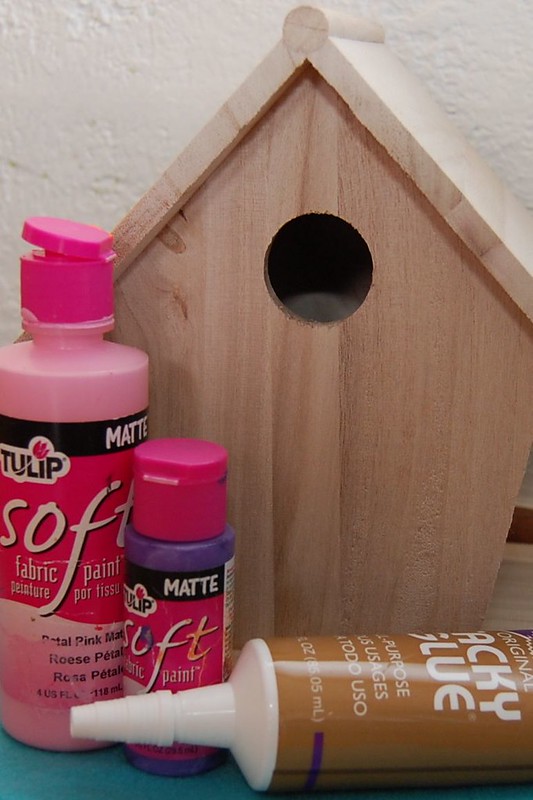
SUPPLIES
Aleene's Tacky Glue
Paint Brush
Paint
Sparkle Collage Pauge
Easter bunny figurine
Felt
Rik Rack
Sheet of card paper
Small button

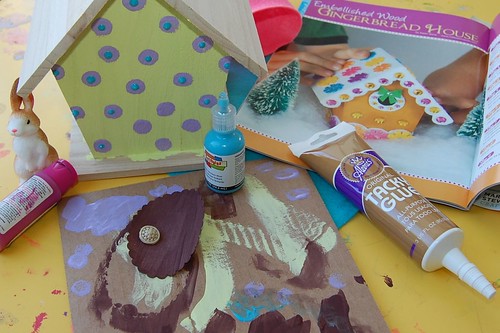
Using Easter hues paint your bird house. I wanted the back of my birdhouse to the be the front. In other words the hole and wooden bird perch will be on the backside.

I made a small scalloped edge door out of card stock and painted it brown. Once all the paint is dry use Collage Pauge to adhere your door. I opted for sparkle and gave the entire thing a coat.

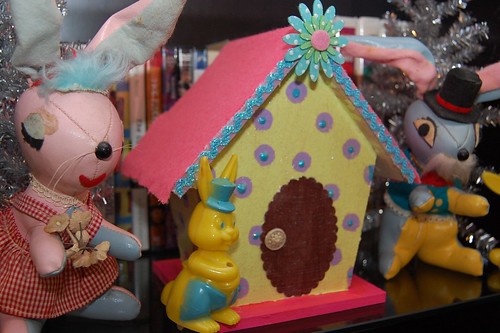
Once your Collage Pauge has dried you can start adding all the fun embellishments. I went with rick rack, pink felt, polka dotted flowers and a vintage button door knob. I used Aleene's Tacky Glue to attach everything.

I think Mr. Bunny looks pretty smitten with his new digs. I know I'd love a sparkly polka dotted house.

iLoveToCreate Craft Haul Video with The Impatient Crafter

Wednesday, February 27, 2013

Craft Haul Video for iLoveToCreate  

(from The Impatient Crafter!)


One of my favorite freelance gigs is working as a blogger for the fine folks at iLoveToCreate. They make some of the coolest products in the craft industry and they're some of the nicest people you'll ever meet. Their team is unparalleled, creative, visionary and smart. So when I get a box filled with new goodies to use in my blog posts and designs, it's always a party at Casa de Potter. This time, we decided to film the most auspicious opening of the latest box of awesome. 

Yup, it's an iLoveToCreate Craft Haul Video!  Huzzah!

Be forewarned, I try to keep my tongue firmly planted in my generously rouged cheek at all times.  So if you're looking for a straight forward haul video, this isn't it.  If you're looking for a little chuckle, a lot of chutzpah and a bevy of bodacious products including Tulip Body Art, Tulip Tie Dye, Tulip Glam-it-Up and more...well you've come to the right video!

Enjoy!

xoxo
Madge a.k.a. Margot Potter

How to make Tie Dye Rainbow Socks

Tuesday, February 26, 2013
Do you love color as much as we do?  Then you'll want to make a pair of your very own Tulip One-Step Tie Dye socks (or leggings as some may call them).  We are so ecstatic how these tie dye socks turned out. They were created by superstar designer Lauri Eaton.  So fun and truly statement making for your wardrobe! Lauri shows you how to make them below...


What you need:

Tulip One-Step Tie Dye (Neon kit for rainbow socks; Vibrant kit for green, blue, and purple pair)
– Long 100% cotton socks (we got ours from Dharma Trading Company)
– Surface Cover

– Paper Towels
– Drying rack (optional)

Before you begin:  Prepare your work area and wet your socks and squeeze out any excess water.
Lauri started off making the blue, green, and purple socks.  For these socks, you will fold them in half, then fold them again to make four layers.
Section the socks into three sections using the zip ties.  Pull the zip ties as tight as you possibly can for best tie dye results. 
 Fill your tie dye bottles with water and shake well. Now place the socks on a drying rack and squeeze the 3 tie dye colors on each section.  Make sure to not squeeze all around the zip ties.  The colors will seep toward the zip tie as it sets, so there's no need to stress about getting every teeny tiny white area!
This is what the dyed socks looked like before Lauri covered them to set.  She let them set for 10 hours!  That's why the colors turned out so intense.
For the rainbow tie dye socks, Lauri folded them in half, then dyed them in rainbow color order.  Notice there's a paper towel underneath the rack to catch the dripping dye.  Sometimes the paper towels turn out so pretty!


We love how the socks turned out and now want to make more!  Do you think you'd like to rock some tie dye socks?  They'd even be fun for just around the house!
Love tie dye? Check out these other fun, vibrant project ideas!!

"A is for Animal" Wall Decor!

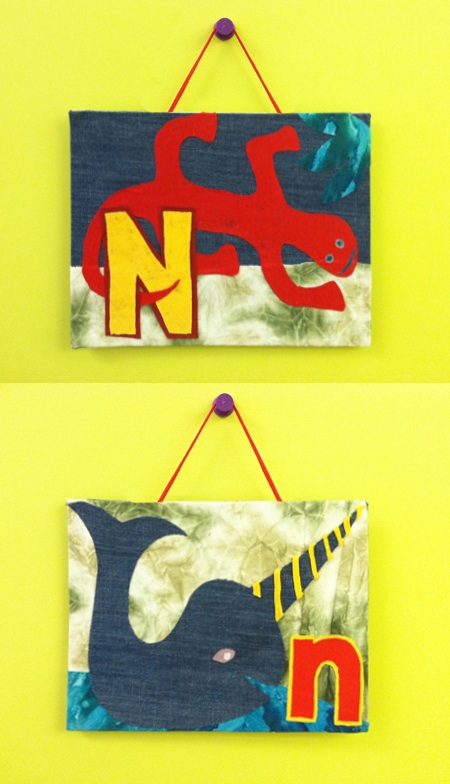
A is for Ant, B is for Beetle, C is for Cat.... Here's an easy way to turn old clothing scraps (in this case, T-shirts and jeans) into personalized decoration for a young (or young at heart) friend's bedroom wall or door. Whether you stick with the animal theme, or go with fruits and veggies (A is for Apple, B is for Broccoli, C is for Carrot), geography (A is for Australia, B is for Belgium, C is for China), or a more random selection of words (A is for Astronaut, B is for Bubbles, C is for Castle), part of the fun is brainstorming the image that will represent the recipient's initial. For me, N is for Narwhal was a shoo-in. N is for Newt came second. What animal would you choose for your name?

Materials:
-Paper
-Pen
or pencil
-Scissors
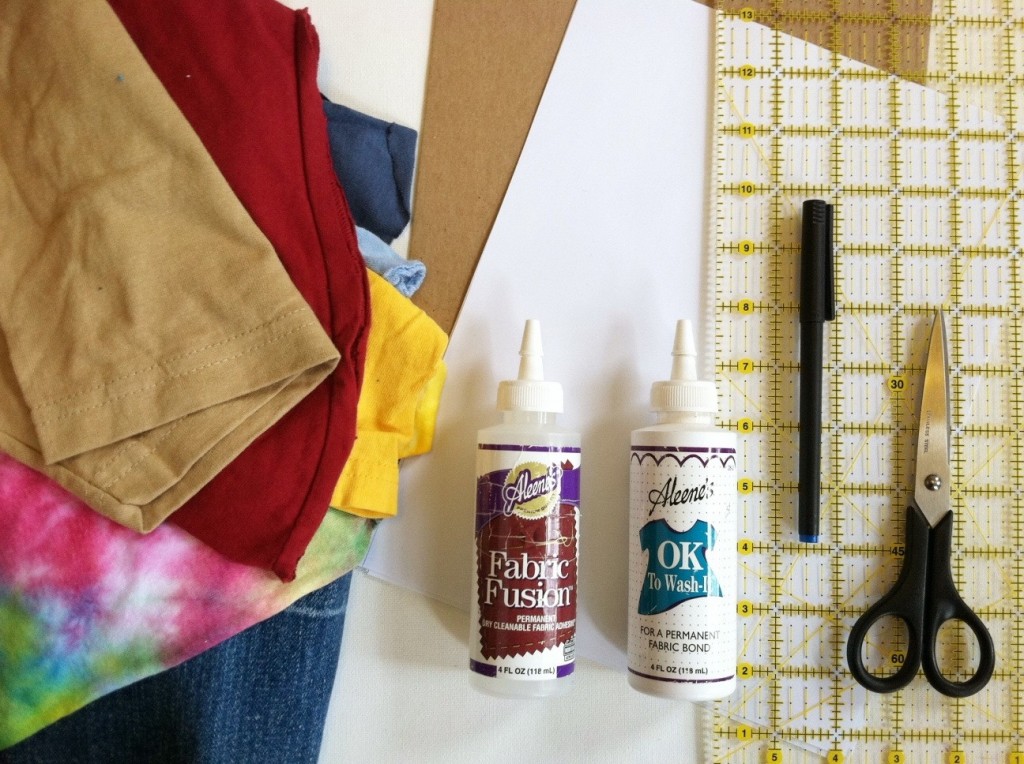
-Fabric scraps (old T-shirts and denim pieces)
-2 sheets 8 1/2" x 11" medium-weight cardboard (often used as stiffener in a flat parcel)
-Aleene's OK to Wash It
or Aleene's Fabric Fusion permanent fabric adhesive
-Ruler
-Fabric paints (optional, for additional embellishment)


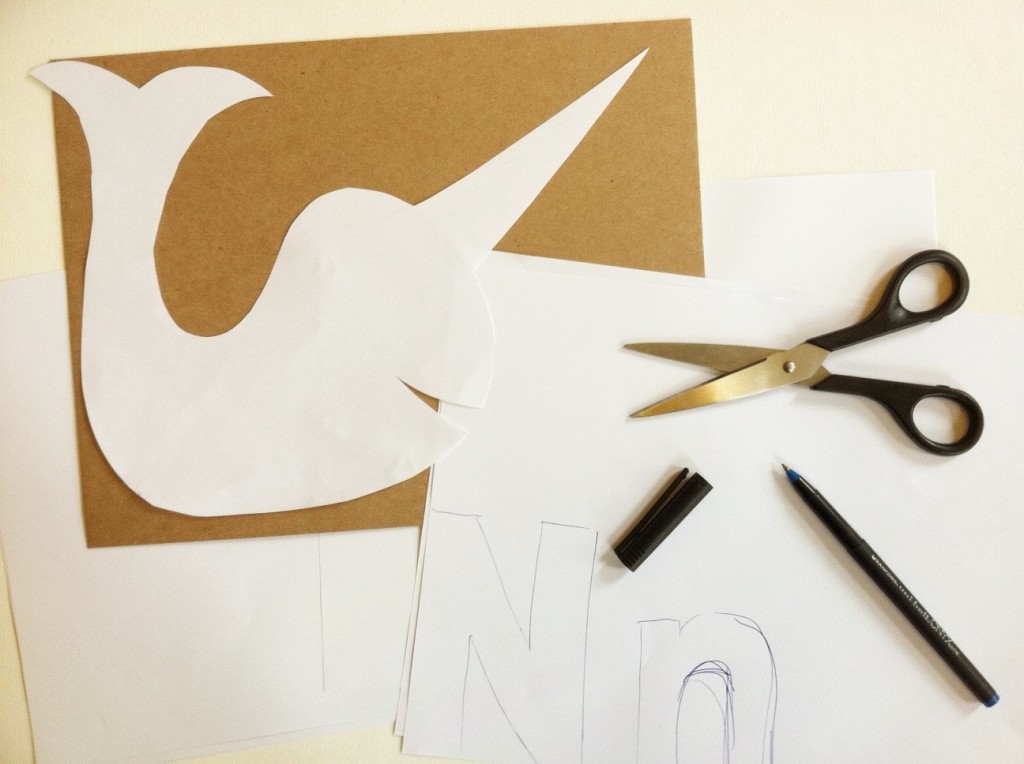
1. Select a first initial and then choose an animal (or two) with a name that also begins with the letter: I chose to start with N for Narwhal (that fabulous sea mammal that looks like it was crossed with a unicorn) and N for Newt (an orange salamander. Draw an outline of each animal and the capital and lowercase letter. Cut them out and arrange them on the cardboard to make sure they'll fit. Set them aside.

2. Spread fabric glue evenly over one side of one of the sheets of cardboard and press it onto fabric.
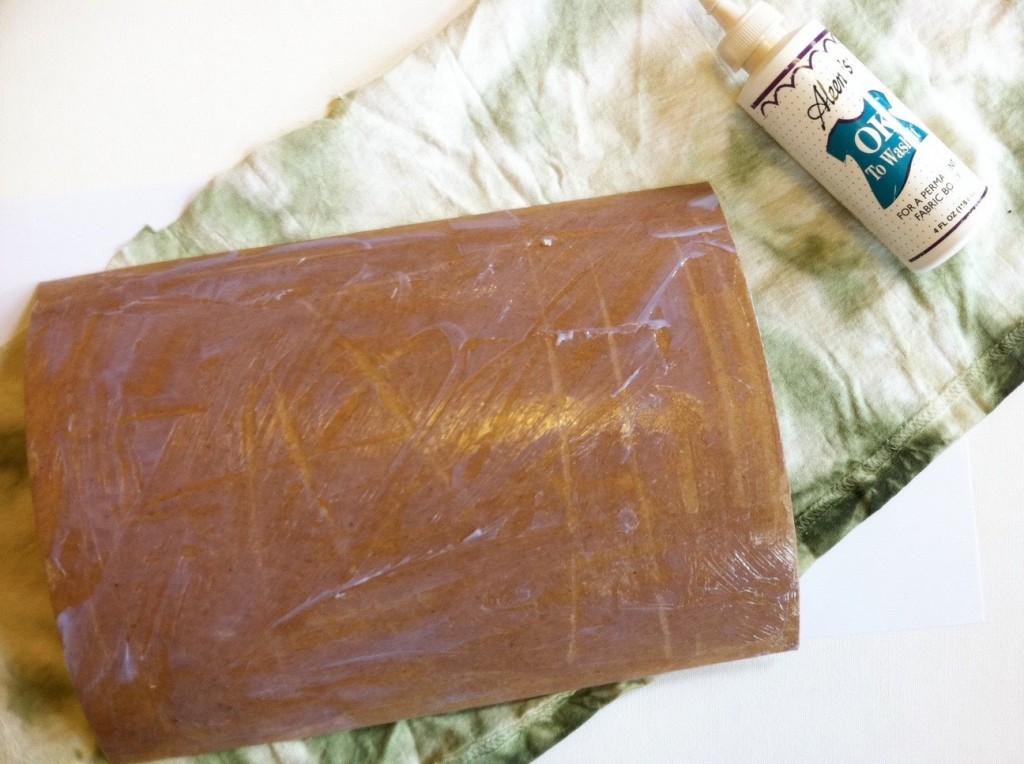

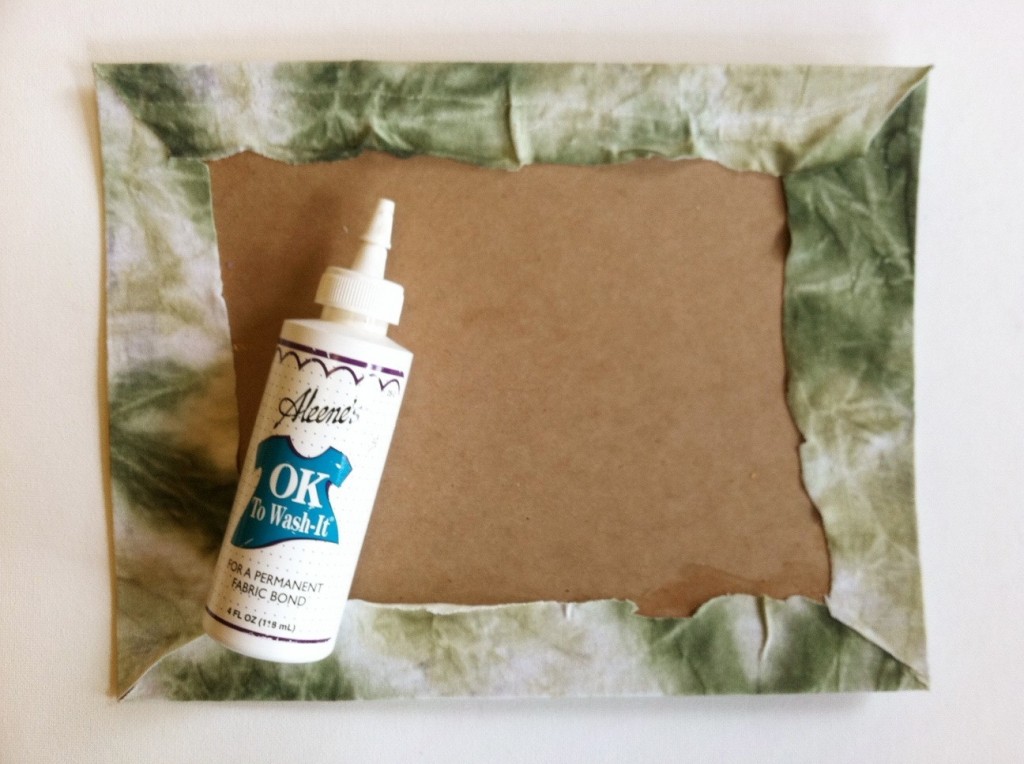
3. Fold and glue the edges to the back of the cardboard. (It's okay if the edges are messy -- they'll be covered up.)

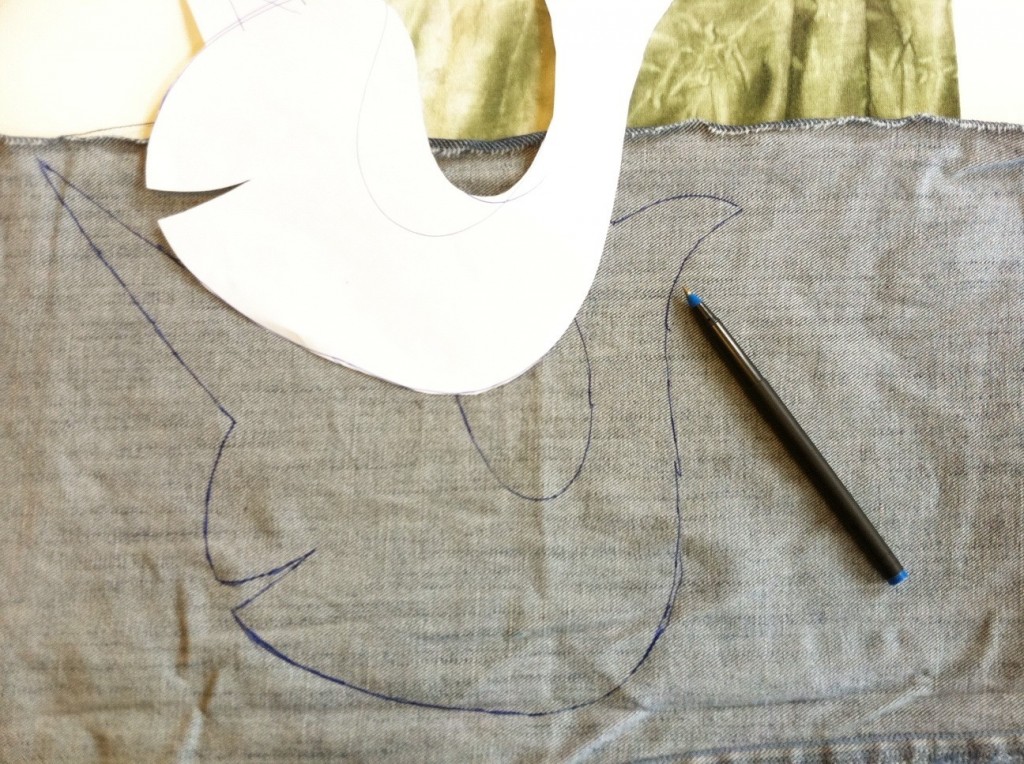
4. Trace one of the paper animal templates (in reverse) onto the wrong side of one of the fabric scraps. Repeat with different scraps with the letters and second animal.

5. Arrange and glue each of the elements onto the fabric-covered cardboard. Add background (like water!) and details (spiral on the horn, eyes!), making sure to layer the pieces appropriately. Let it dry and proceed to decorate the second piece of cardboard!
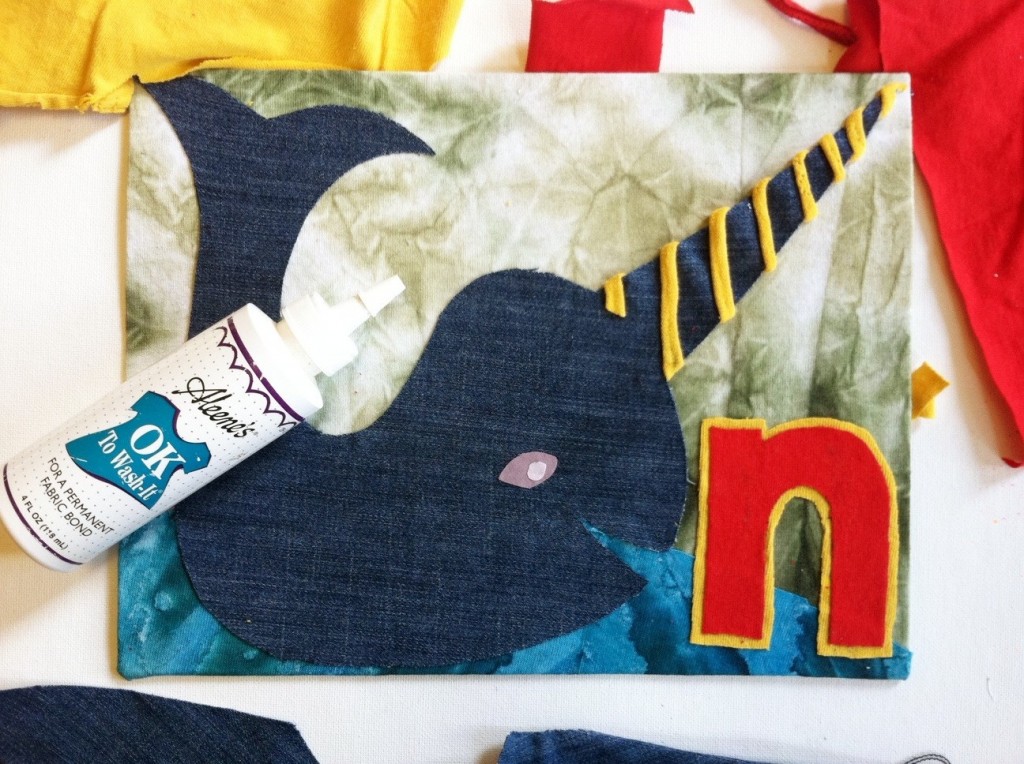

6. Cover the second piece of cardboard by following steps 1 and 2. Arrange and glue on the embellishments by following steps 4 and 5.
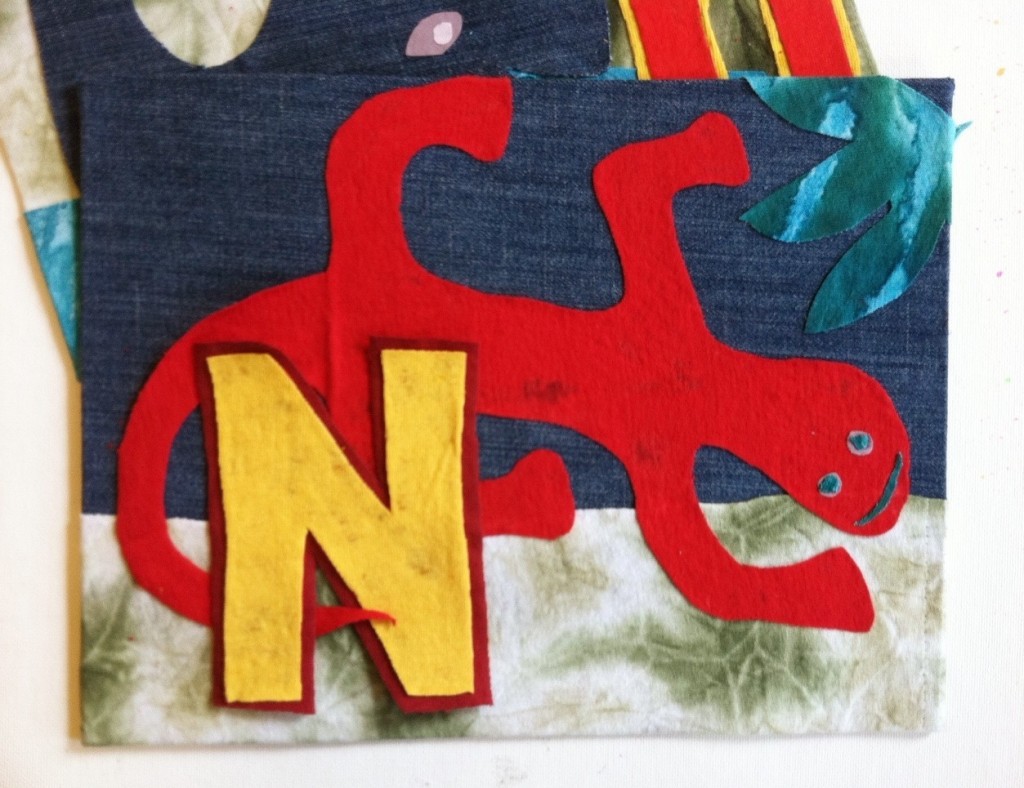

7. Flip one of the panels backside up and measure about 3" in from each side. Mark each point.


8. Squeeze fabric glue at each mark, and press the length of a T-shirt cord into each line of glue.
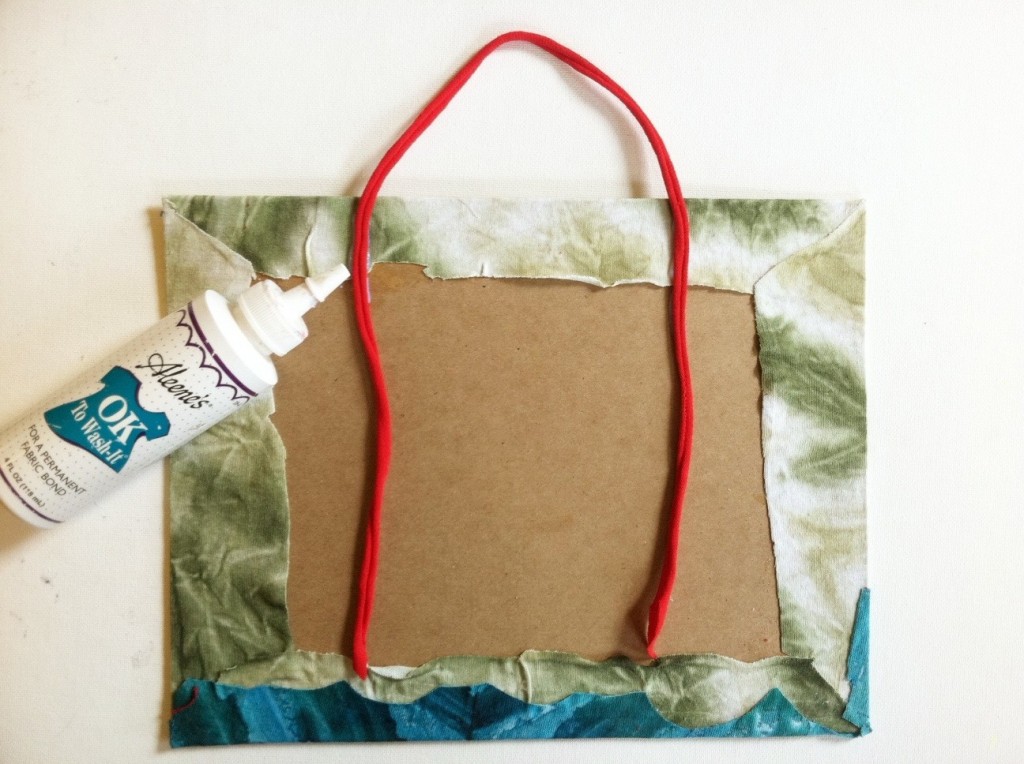

9. Then spread glue across the entire backside of one of the panels and press it firmly to the back of the other, sandwiching the hanging strap ends between them. (This tidily covers any messy work and makes the sign reversible, whether you prefer caps or lowercase -- or narwhals or newts.) Let it dry.


10. A, B, C, D, E, F, G...H, I, J, K, L, M, N is for Newt and Narwhal!
After it's completely dry, choose a side to display and hang it up!
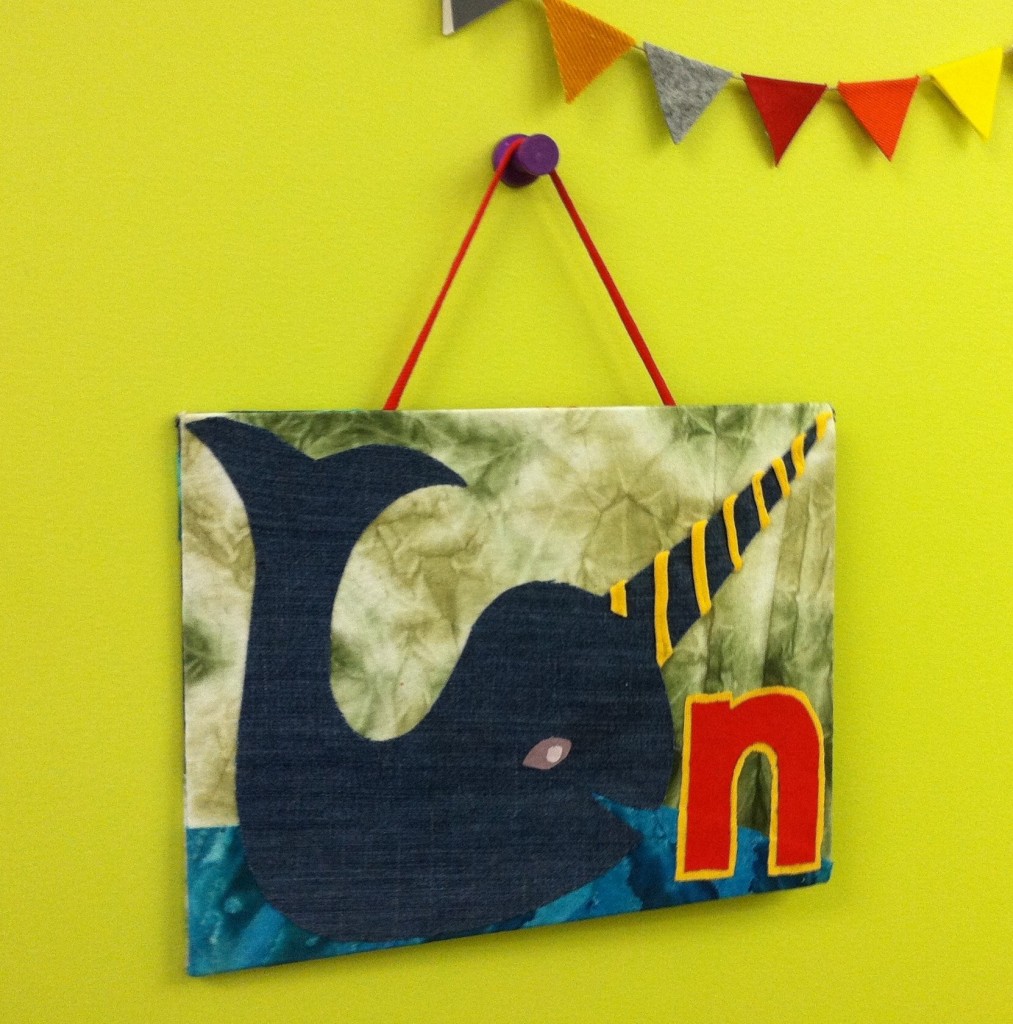

Variations:
-If you're feeling ambitious, make multiple signs to spell out a person's name. Arrange them in a row, a column, or rectangle.
-If you're feeling really ambitious, make the whole alphabet, and line the edges of the room with A through Z animals!

52 weeks of Art Plates with Laura Fraedrich: Weeks 7 and 8

Saturday, February 23, 2013
Greetings, iLoveToCreate® blog fans! I am excited to share the next two plates in my Art Plate series with you today!


Originally when I started this project, I was planning on using my own words on my plates, similar to how I art journal. I have been finding so many great famous quotes and song lyrics, though, that I have been using them instead. It's almost the same thing, because these quotes and lyrics really speak to me. So why reinvent the wheel if I don't need to? This way I get to focus more on making the art.

My next two plates kind of go hand in hand. They're both about using and following your heart and inspired by Valentine's Day. 


 Plate #8 – Open Up Your Heart
I painted this one on Valentine's Day, and the quote is from the song 'Look Through Any Doorway' by The Kinks. Quite appropriate for V Day if I do say so myself!


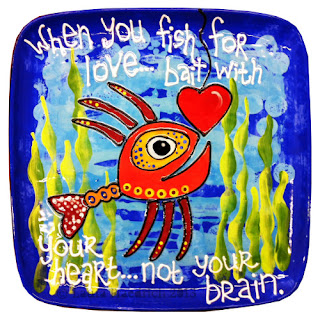
 Plate #9 – Fishing for Love
I knew I wanted to make an ocean themed plate this week because I was recently inspired by these great little wooden fish wall hangings I came across while shopping one day. The quote I used is by Mark Twain, and I think it's really good advice.

Both plates were made using Duncan® OhFour® Bisque plates, Cover Coats™, French Dimensions™ and Pure Brilliance®

Eight plates down and 44 more to go. I write about them in more detail on my personal blog – The Peculiar Palette – if you’d like to read more…

Until next time! 
Laura

Happy Easter! Cool2Craft TV

Friday, February 22, 2013

Join us for a new episode of Cool2Craft TV February 25, 2013 - the Cool2Craft team is sharing some fun new Easter crafts! Tiffany is creating Embellished Eggs featuring Aleene's Fast Grab Tacky Spray and Heidi is crafting Sock Egg Chicks with Aleene's Flexible Stretchable Glue.


Learn new techniques, chat with us while watching the show and ask questions about all your favorite Aleene's products!

Airing Monday February 25, 2013 9 am Pacific/10 am Mountain/11 am Central/Noon Eastern.

How do you join us? Go to Cool2Craft.com and you'll see the link to the Livestream player and chat box where you can join right in. See you in the chatroom on Monday or drop by anytime this week to watch these cool video tutorials!

Visit us on Facebook! Watch our video tutorial archives on YouTube! Get creative! Get inspired! Be cool!

CRAFTY CINEMA: Easy Oscar Party DIY

I'm a huge movie buff. I love movies like little kids love Disneyland. I can never get enough! So you can imagine how thrilled I am for the Oscars!  I don't exactly throw a huge soiree for the event, but I do like to make small, glittery decorations to enhance the TV watching expereince. Today is Friday, which doesn't leave much time Sunday. But you can still craft some fun items - I made all of these items off of one trip to Target, and I only spent $15!
 You'll also need Aleene's® Double-Stick Tacky Sheet™, Aleene's® Tacky Dot Singles™, Aleene’s® Tacky Dots™

Project #1: Movie Quote Plates

 
For this project you'll need clear plastic plates, Tulip Fashion Glitter and the Sticker Sheets and/or Dots. You'll need to print out pictures of your favorite actors or actresses. I went with the nominees.
Next, remove one of the sticker sheets and cut to the shape you want on the plate. Peel off the backing and press in place on the plate. Press the picture and quote in place, pour glitter and tap away the excess. Next, add a Tacky Dot on the picture and on the glitter area and  to secure them.
Now you have a cool plate, and it's easy to make more!


Project #2:  Cupcake Toppers!
These are even easier to make, simply print and cut images of the movie posters and also cut scrapbook paper to match. Sandwich a toothpick between the two layers using Tacky Dots. Insert in your cupcakes!
TIP: You can even use these images to make earrings or other party favors!
 
 Project #3: Oscar Statuette Chocolate Squares!
To make these, simply buy a bag of Ghiradelli Chcolate Squares, cut glittery scrapbook paper and images to fit. Use a Tacky Dot or glue stick to affix.
 
Project #4: Prize Badges!
Show your love for your favorite nominee by making a prize ribbon badge. Wear it proudly!

Easter Basket Picture Frame Tutorial

Thursday, February 21, 2013

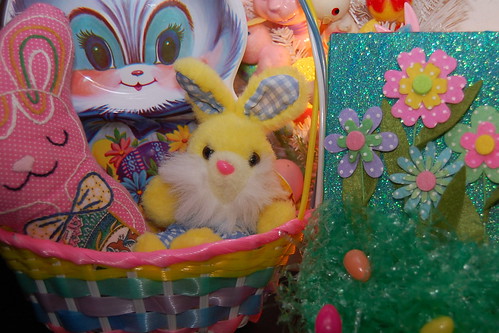
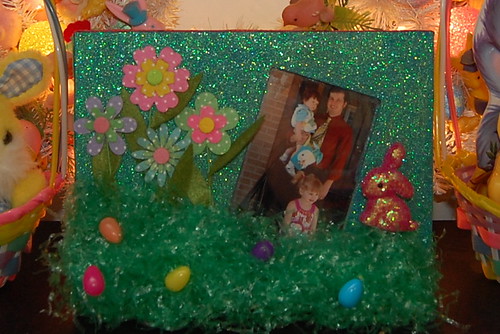
I just can't stop the seasonal frame making insanity. With every holiday comes new pictures to display. Easter is no exception. I hit the craft stores, department stores even the thrift stores - but alas there were no cute Easter frames to be found. Luckily I had a plain wooden frame begging for a makeover lingering in my studio.

SUPPLIES
Aleene's Tacky Glue
Paint Brush
Glitter
Easter Grass
Small Eggs
Small Bunny
Blue Craft Paint

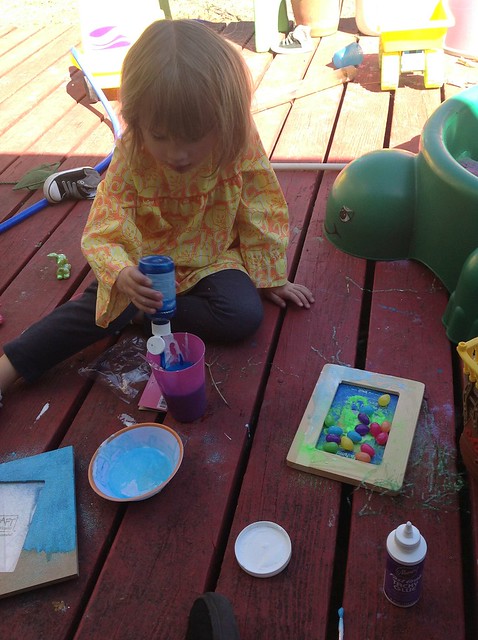
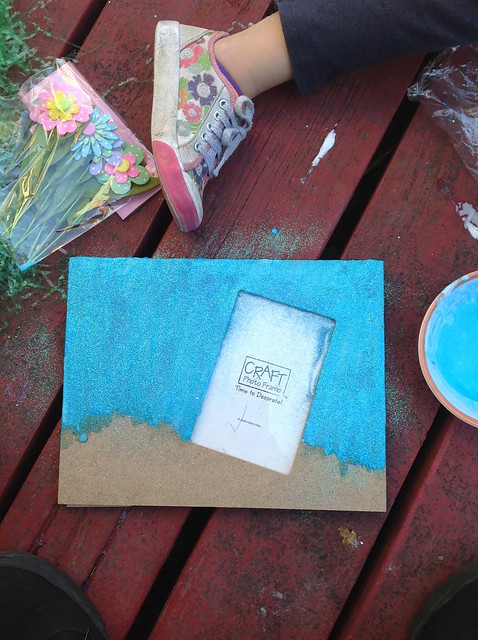
The first thing my crafty partner in crime and I did was make a glue/paint/water potion. I wanted my Tacky Glue thin enough that I could paint it on the frame.

While my glue was still wet I sprinkled blue glitter on top.

For the bottom half of the frame I glued on green Easter grass. Feel free to decorate your grass however you see fit. I opted for plastic eggs, glitter covered bunnies and felt flowers.

All that was left to do was choose the perfect picture of my family to put inside. This is us last year headed into church. I love the way the glitter shimmers by the light of my Easter wreath.